EKF Diagnostics Holdings plc · LSE:EKF
EKF Diagnostics — Investor Presentation (March 2016)
31 slides from EKF Diagnostics's investor presentation, March 2016
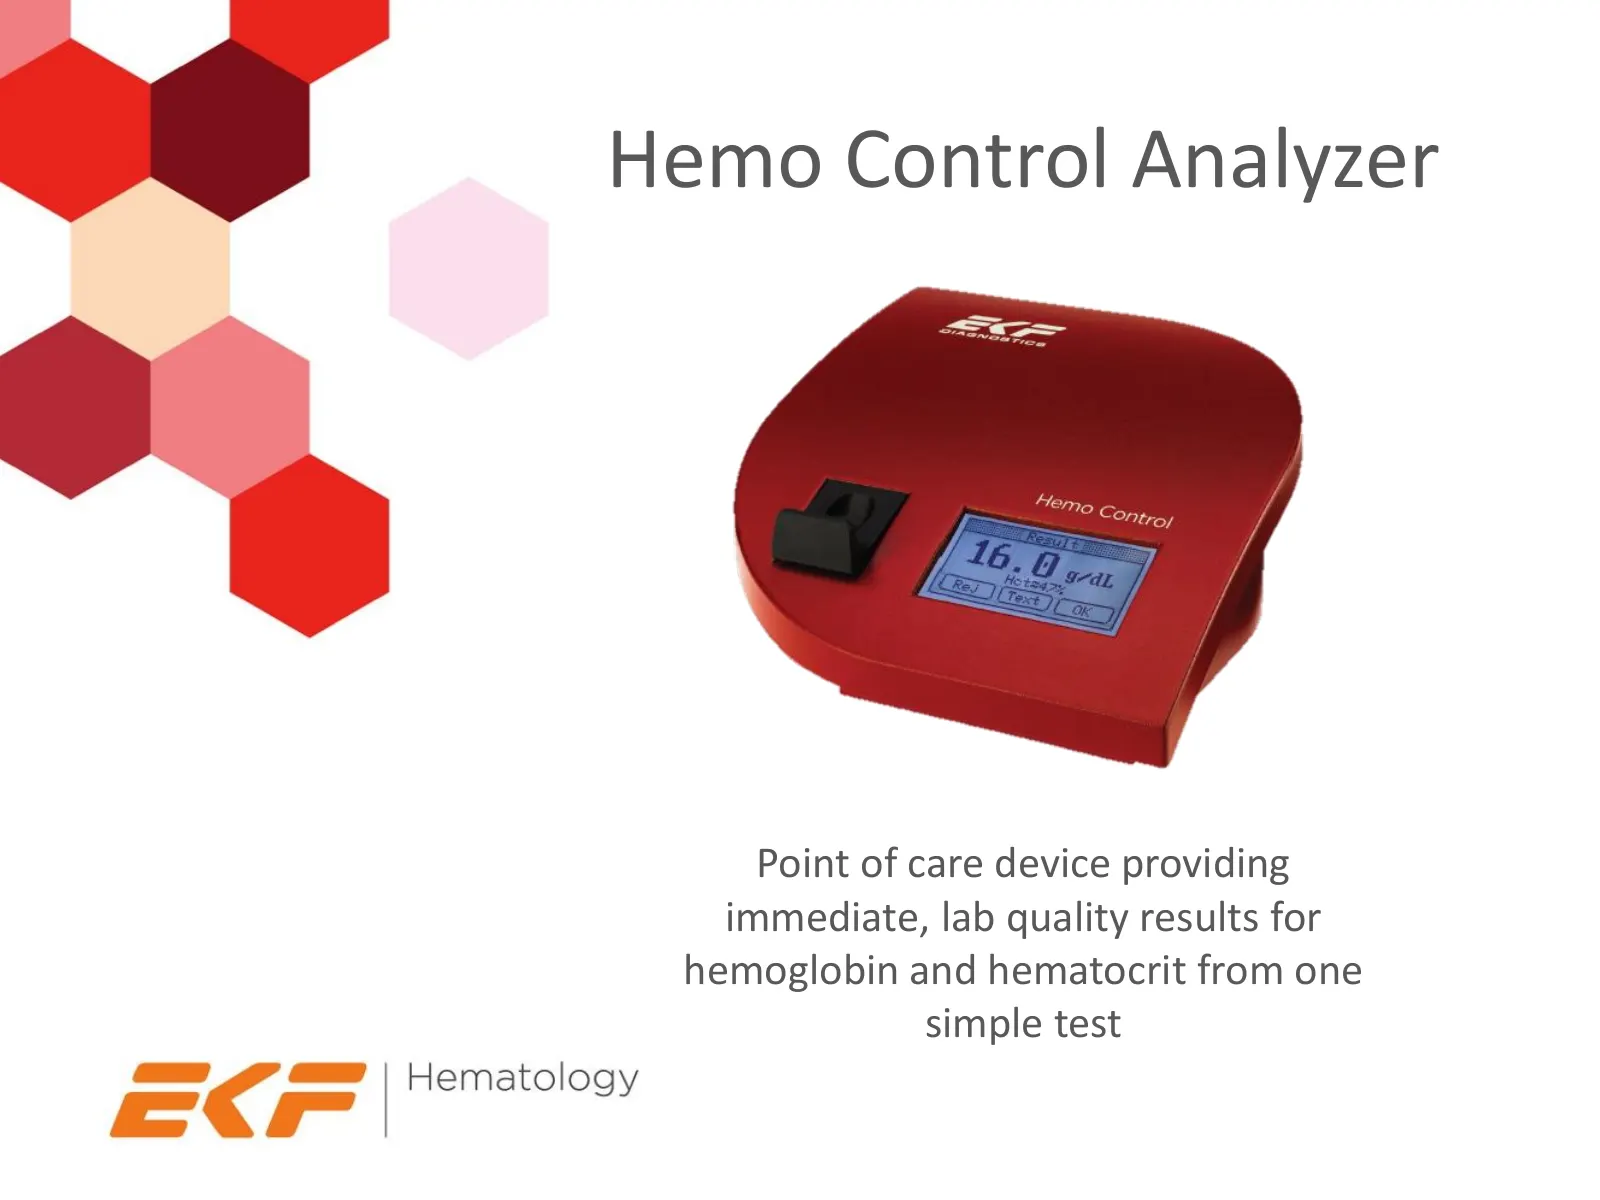
Slide 1: Hemo Control Analyzer
Hemo Control Analyzer Point of care device providing immediate, lab quality results for hemoglobin and hematocrit from one simple test
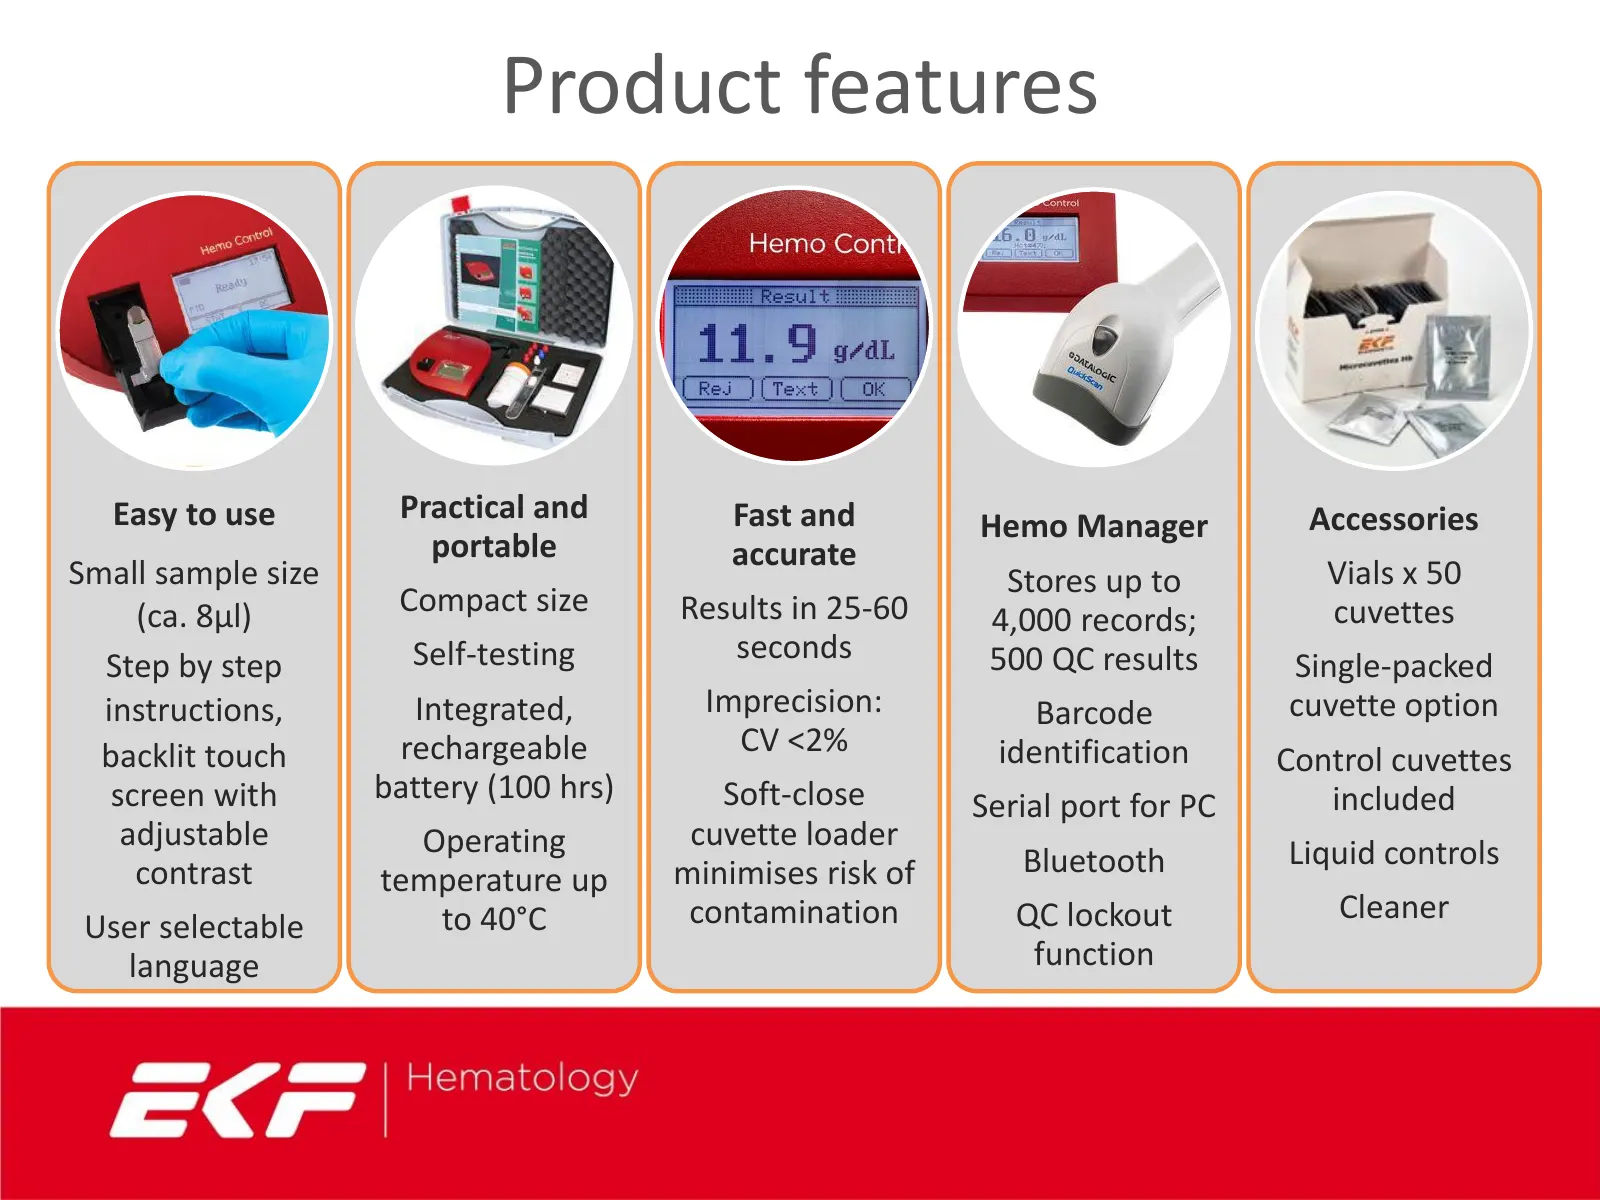
Slide 2: Product features
Product features Easy to use Practical and Fast and Accessories Hemo Manager portable accurate Small sample size Stores up to Vials x 50 (ca. 8μl) Compact size Results in 25-60 cuvettes 4,000 records; Self-testing seconds 500 QC results Step by step Single-packed instructions, Integrated, Imprecisio
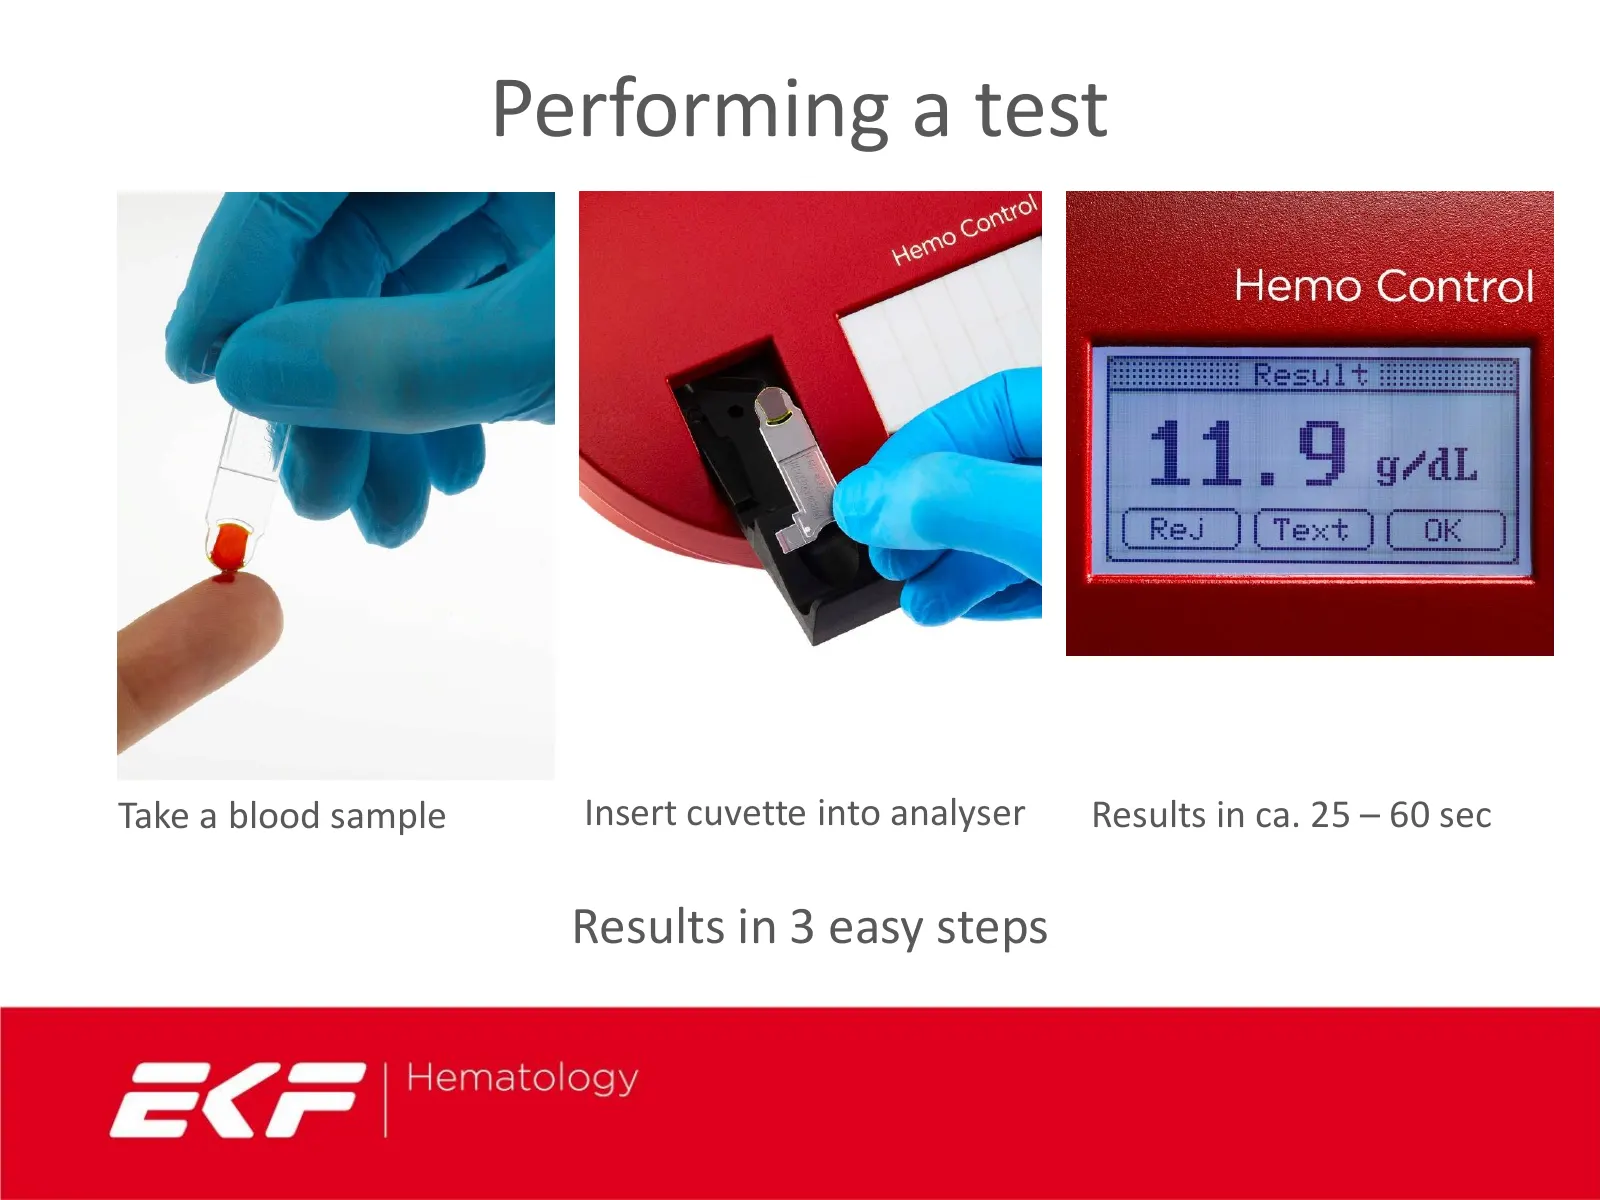
Slide 3: Performing a test
Performing a test Take a blood sample Insert cuvette into analyser Results in ca. 25 – 60 sec Results in 3 easy steps
Slide 4: Performing a test
Performing a test —<r- | Hematology | — Oa
Slide 5: Hemo Control devices
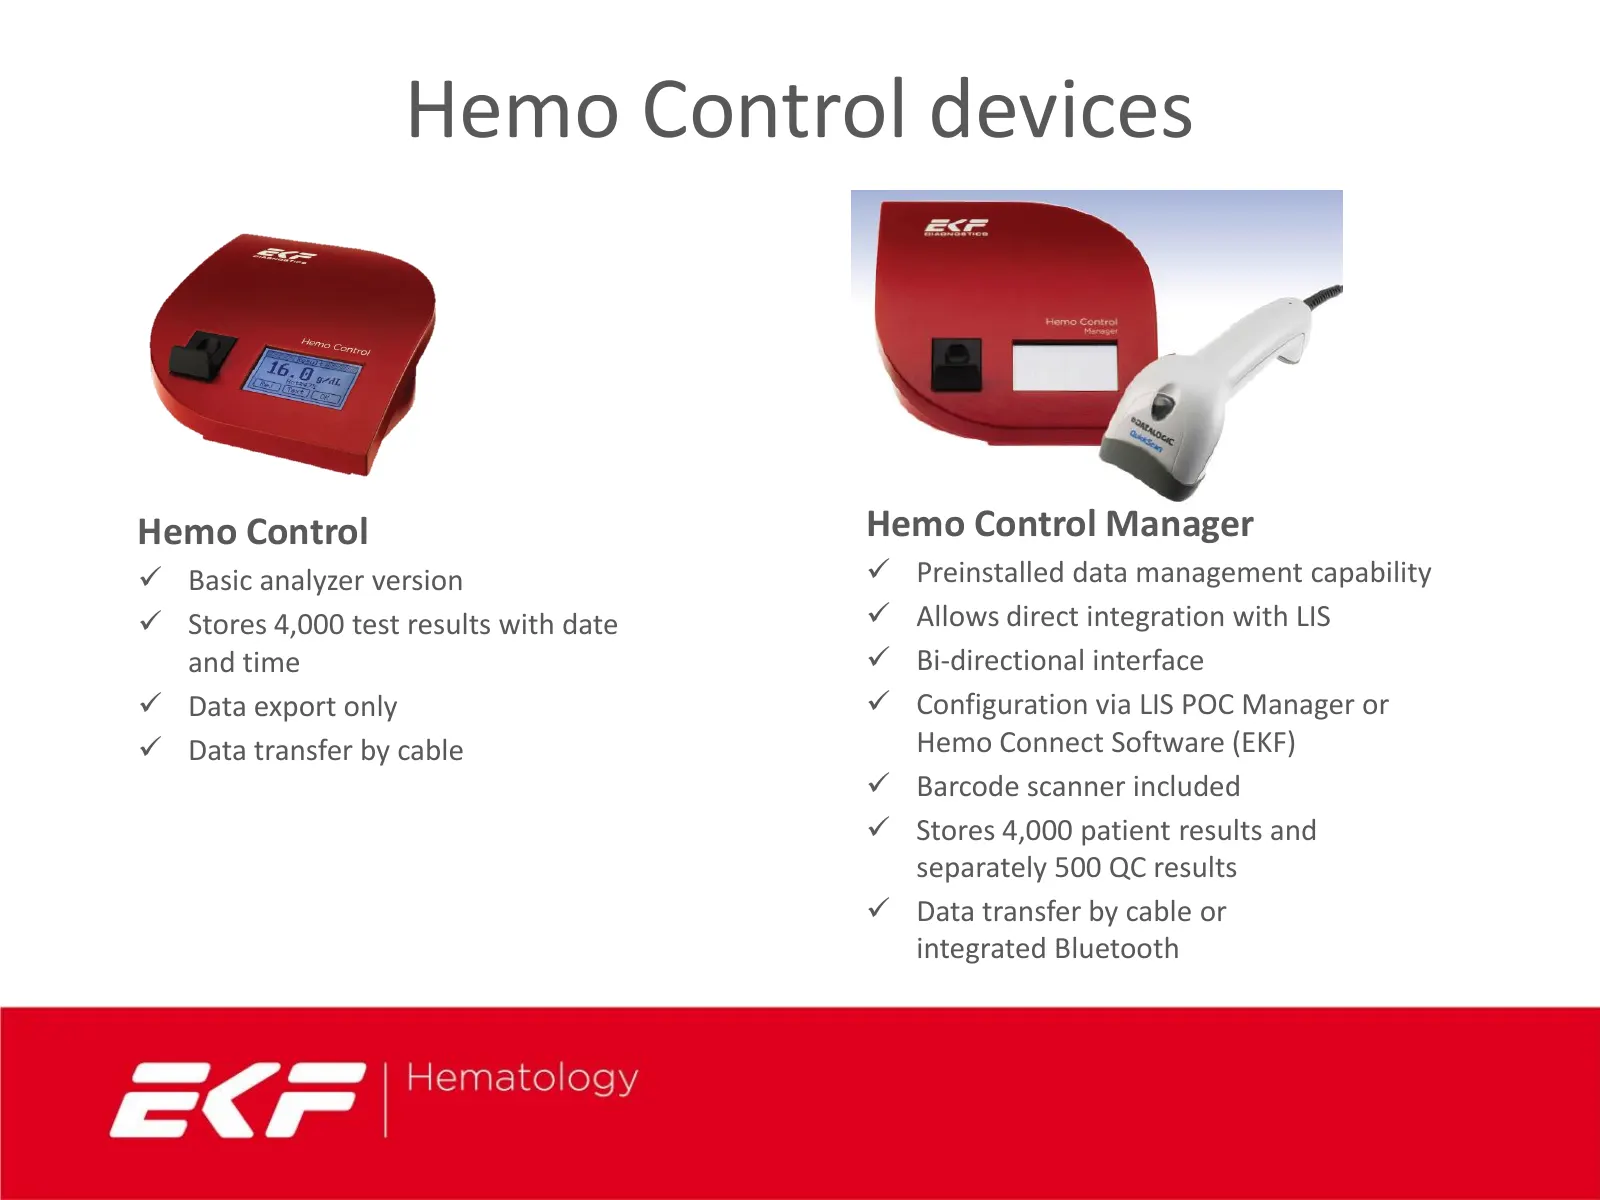
Hemo Control devices Hemo Control Hemo Control Manager Basic analyzer version Preinstalled data management capability Stores 4,000 test results with date Allows direct integration with LIS and time Bi-directional interface Data export only Configuration via LIS POC Manager or Data tr
Slide 6: New! Add pack DM for Hemo Control
New! Add pack DM for Hemo Control Basic version of Hemo Control can be upgraded with Data Management (DM) functions at a later point of time Ideal for customers who are… Planning future connection of POC devices to LIS but have not yet decided Connection to LIS postponed for budget reasons, opti
Slide 7: Add pack DM for Hemo Control
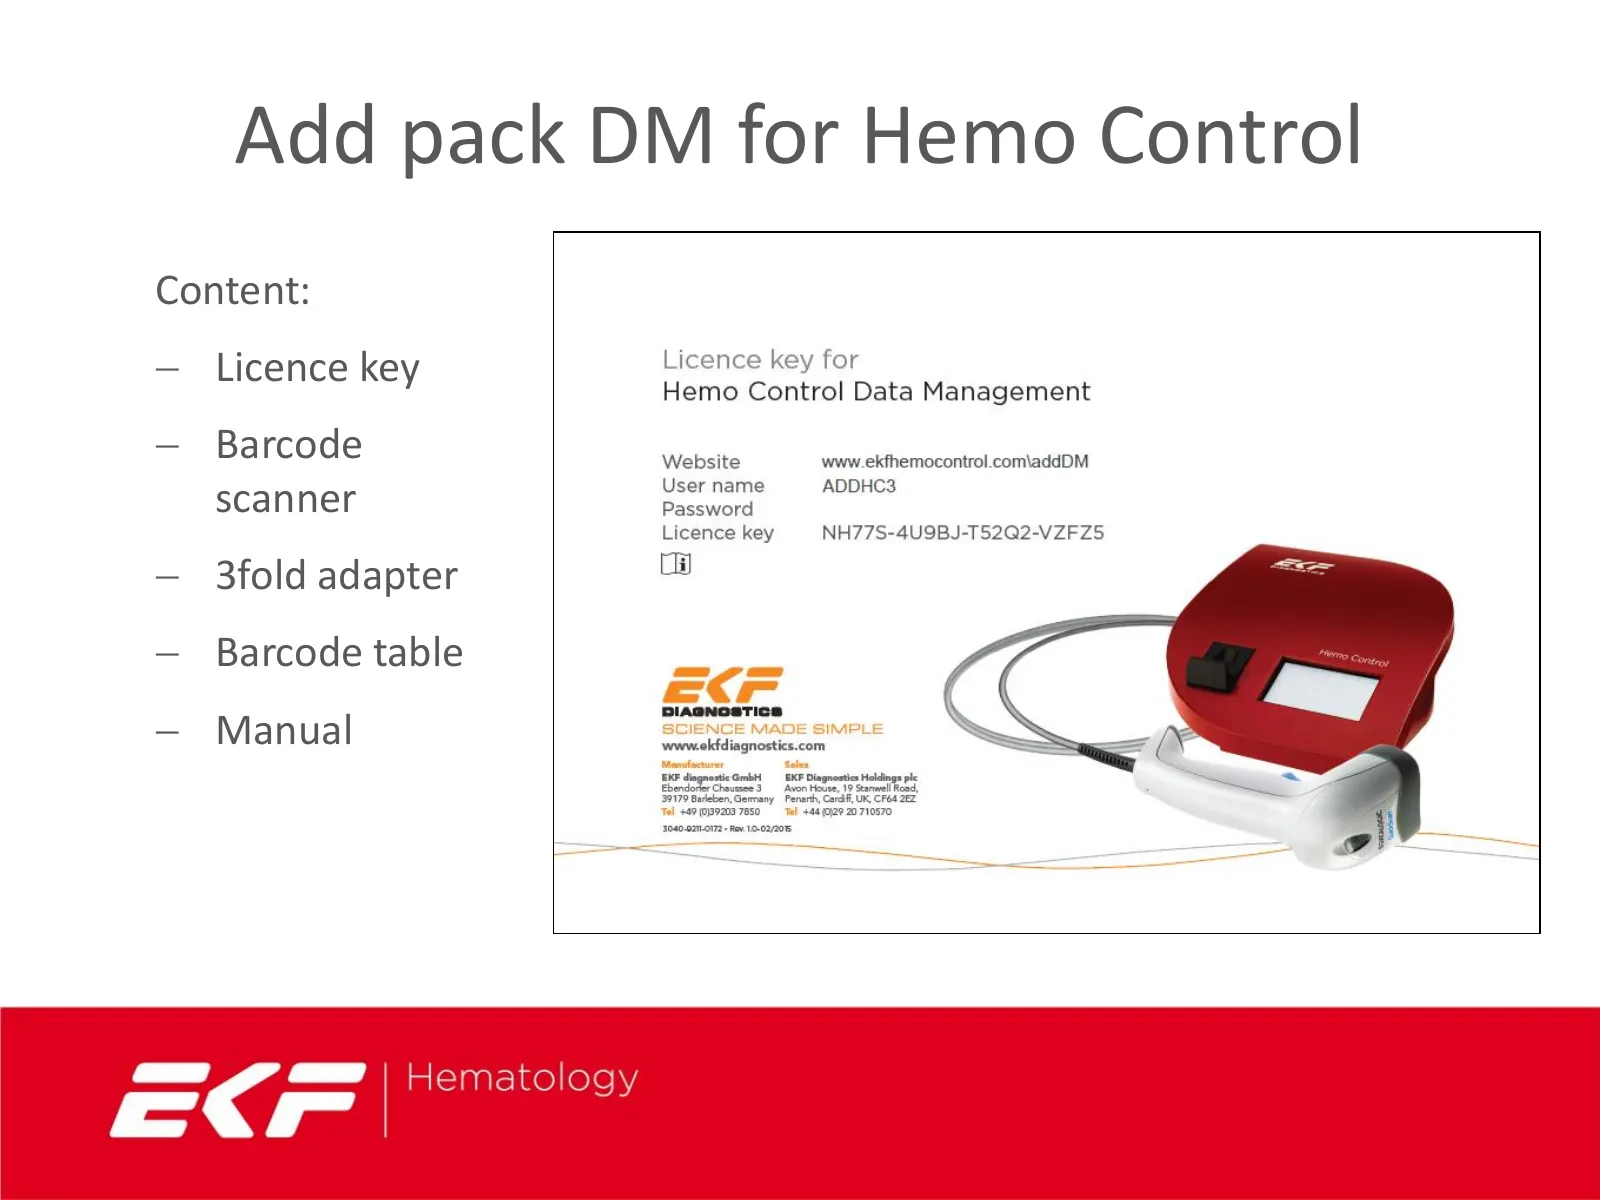
Add pack DM for Hemo Control Content: Licence key Barcode scanner 3fold adapter Barcode table Manual
Slide 8: How to install the 'Add pack DM'
How to install the ‘Add pack DM’ Once the end user has purchased the upgrade they can follow this upgrade procedure: - Go to www.ekfhemocontrol.com\addDM - Access with User Name and Password - Enter Licence Key and serial no. of device - Print out generated barcode - Connect scanner to device and sc
Slide 9: Data management functions
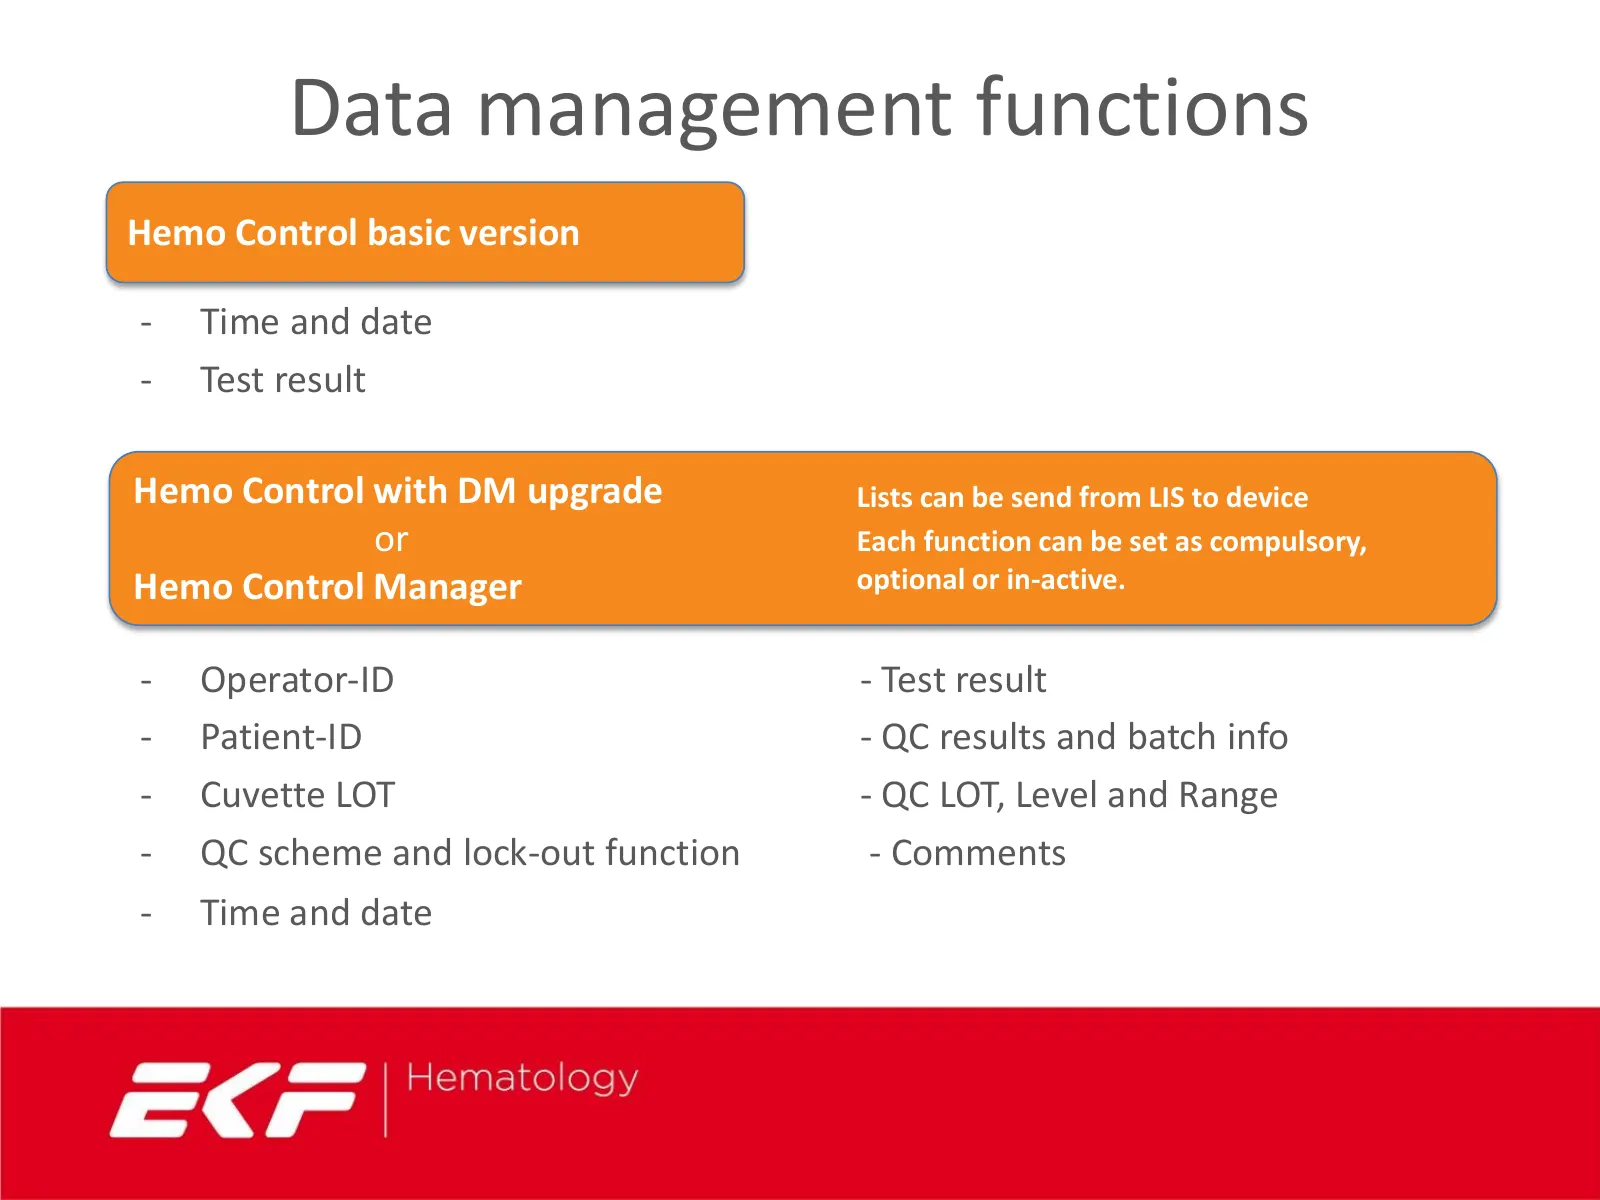
Data management functions Hemo Control basic version - Time and date - Test result Hemo Control with DM upgrade Lists can be send from LIS to device or Lists canfunction Each be sendcan from beLIS setto asdevice compulsory, Hemo Control Manager Each DM function optional can be set as compulsory, or
Slide 10: Public standard protocol
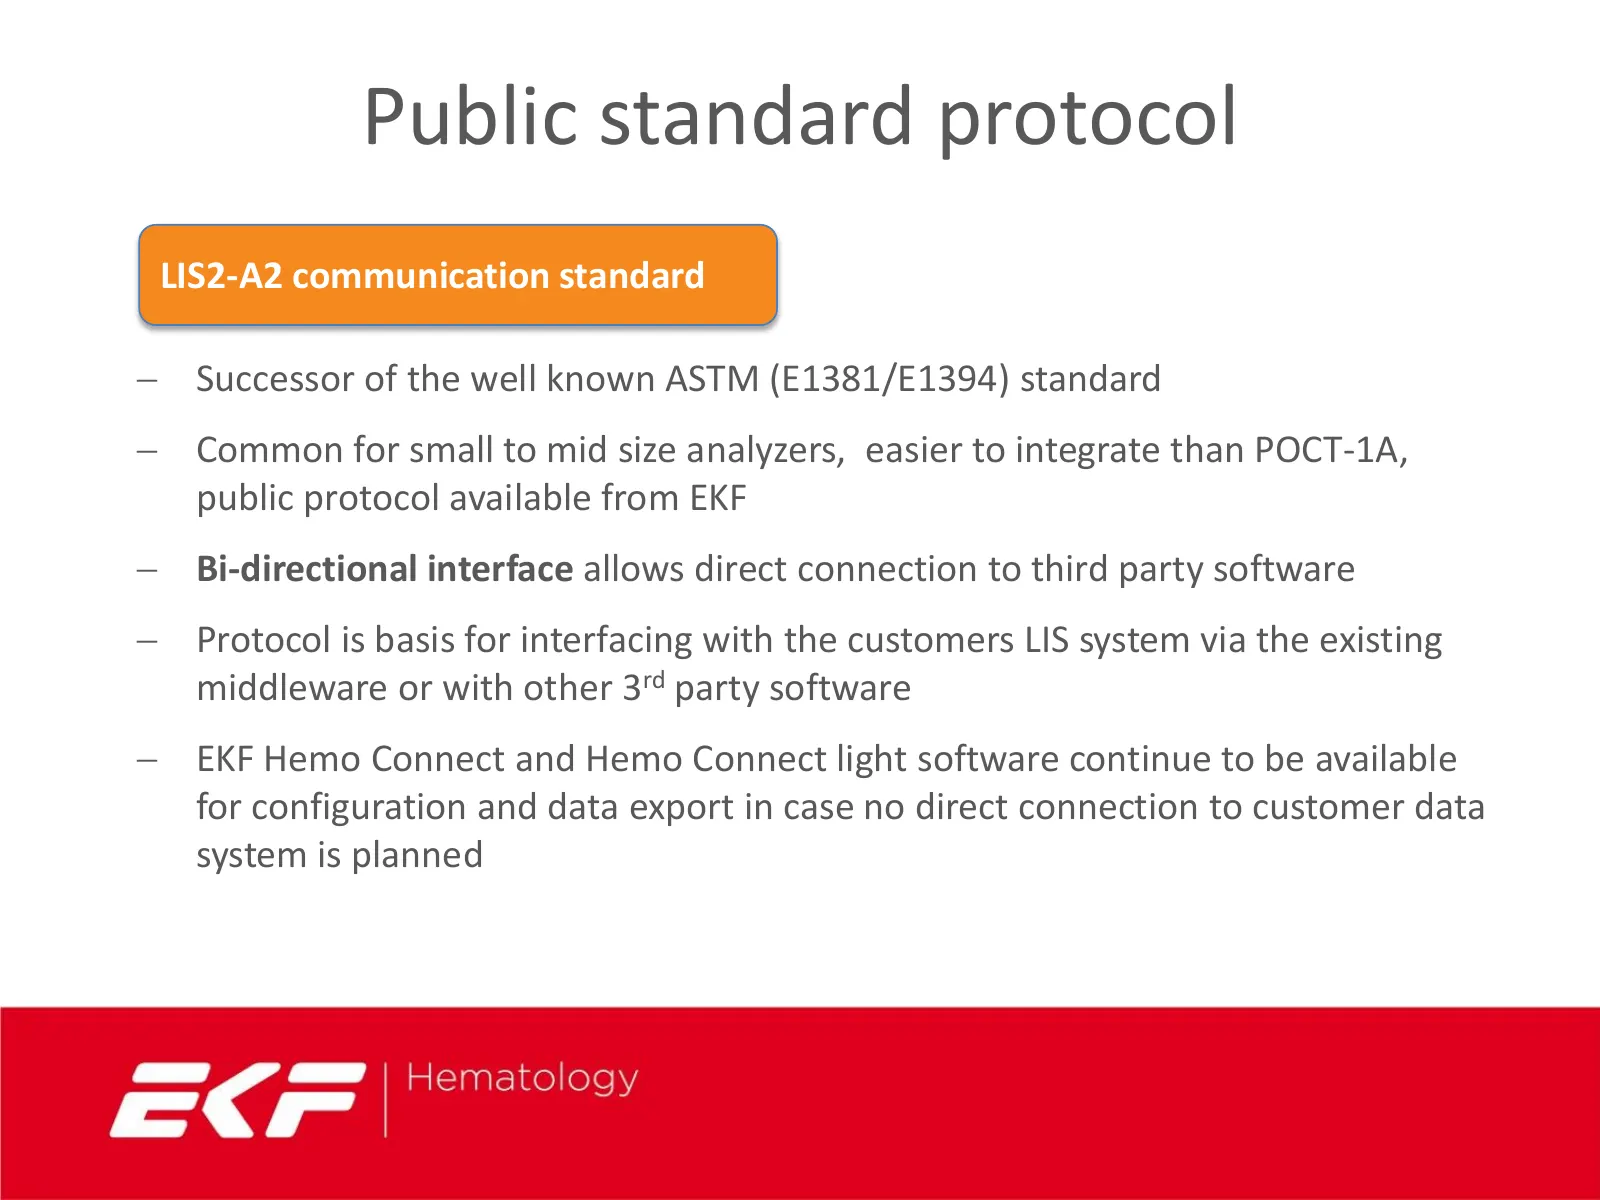
Public standard protocol LIS2-A2 communication standard Successor of the well known ASTM (E1381/E1394) standard Common for small to mid size analyzers, easier to integrate than POCT-1A, public protocol available from EKF Bi-directional interface allows direct connection to third party software
Slide 11: Data connections
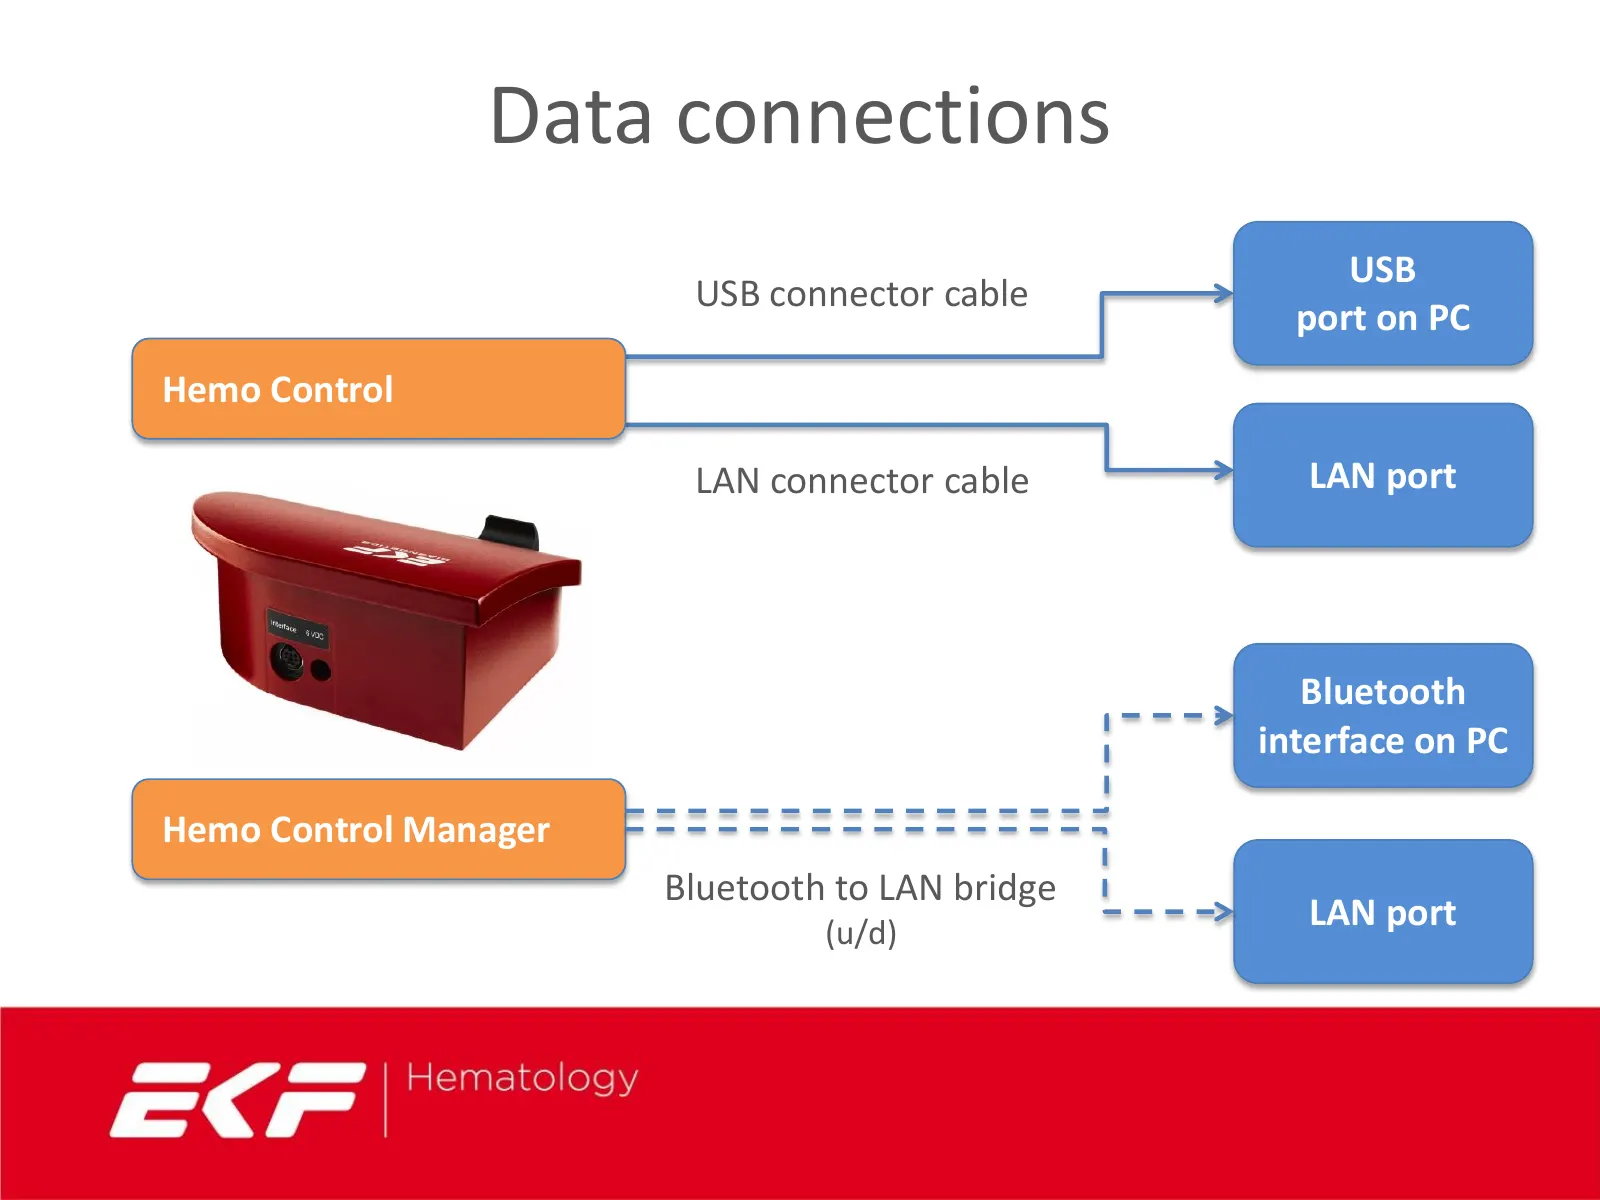
Data connections USB USB connector cable port on PC Hemo Control LAN connector cable LAN port Bluetooth interface on PC Hemo Control Manager Bluetooth to LAN bridge (u/d) LAN port
Slide 12: Accessories
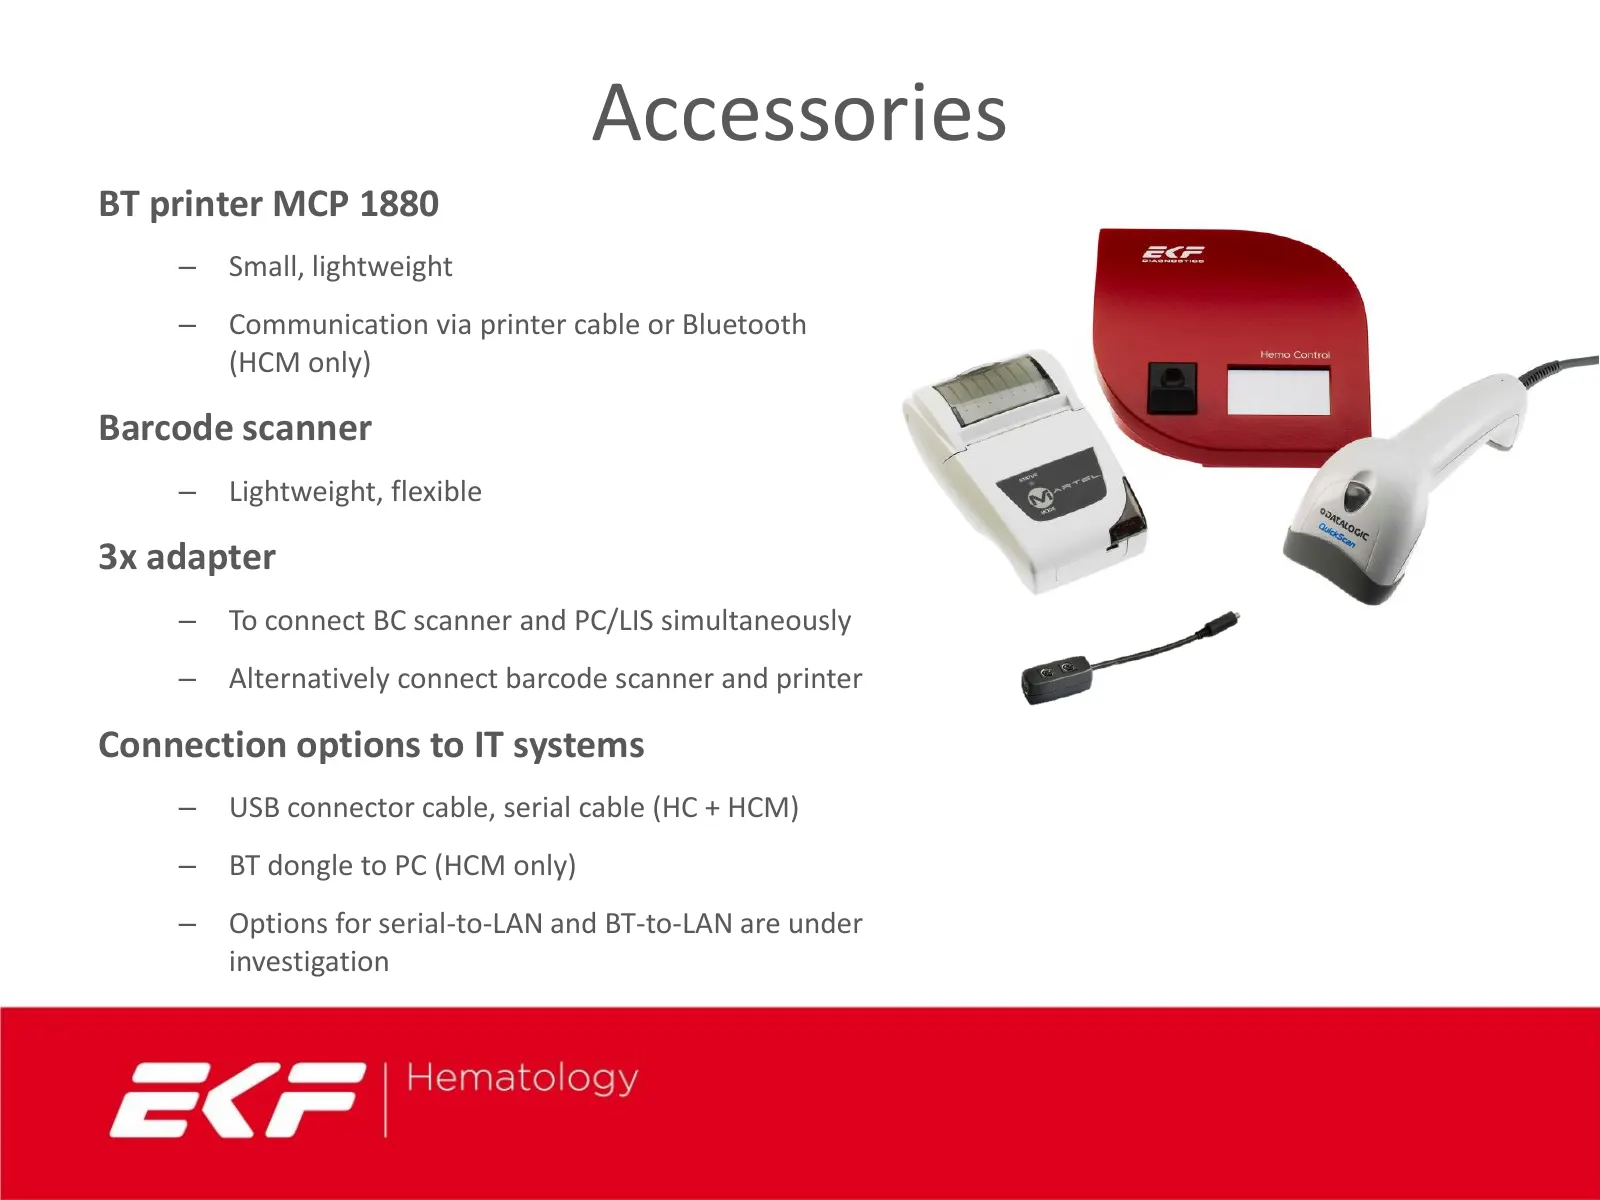
Accessories BT printer MCP 1880 – Small, lightweight – Communication via printer cable or Bluetooth (HCM only) Barcode scanner – Lightweight, flexible 3x adapter – To connect BC scanner and PC/LIS simultaneously – Alternatively connect barcode scanner and printer Connection options to IT systems – U
Slide 13: EKF nxt Microcuvette
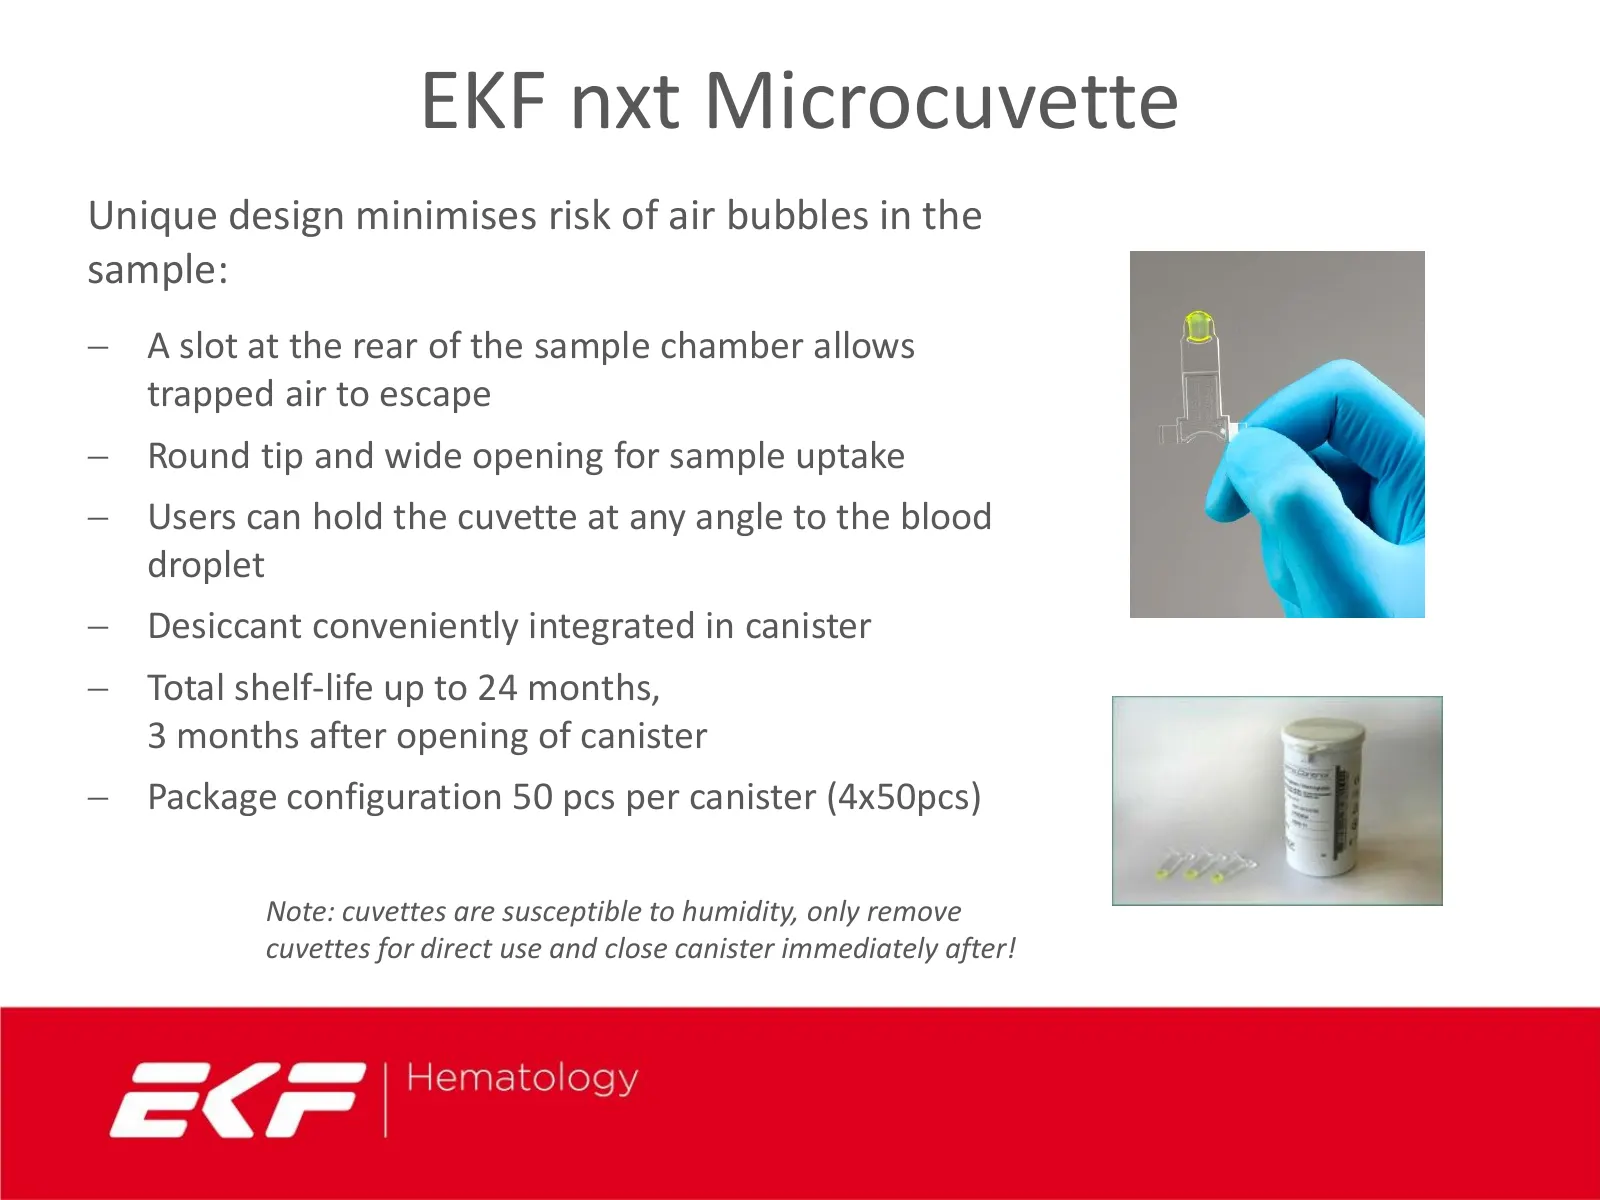
EKF nxt Microcuvette Unique design minimises risk of air bubbles in the sample: A slot at the rear of the sample chamber allows trapped air to escape Round tip and wide opening for sample uptake Users can hold the cuvette at any angle to the blood droplet Desiccant conveniently integrated in
Slide 14: Capillary sampling
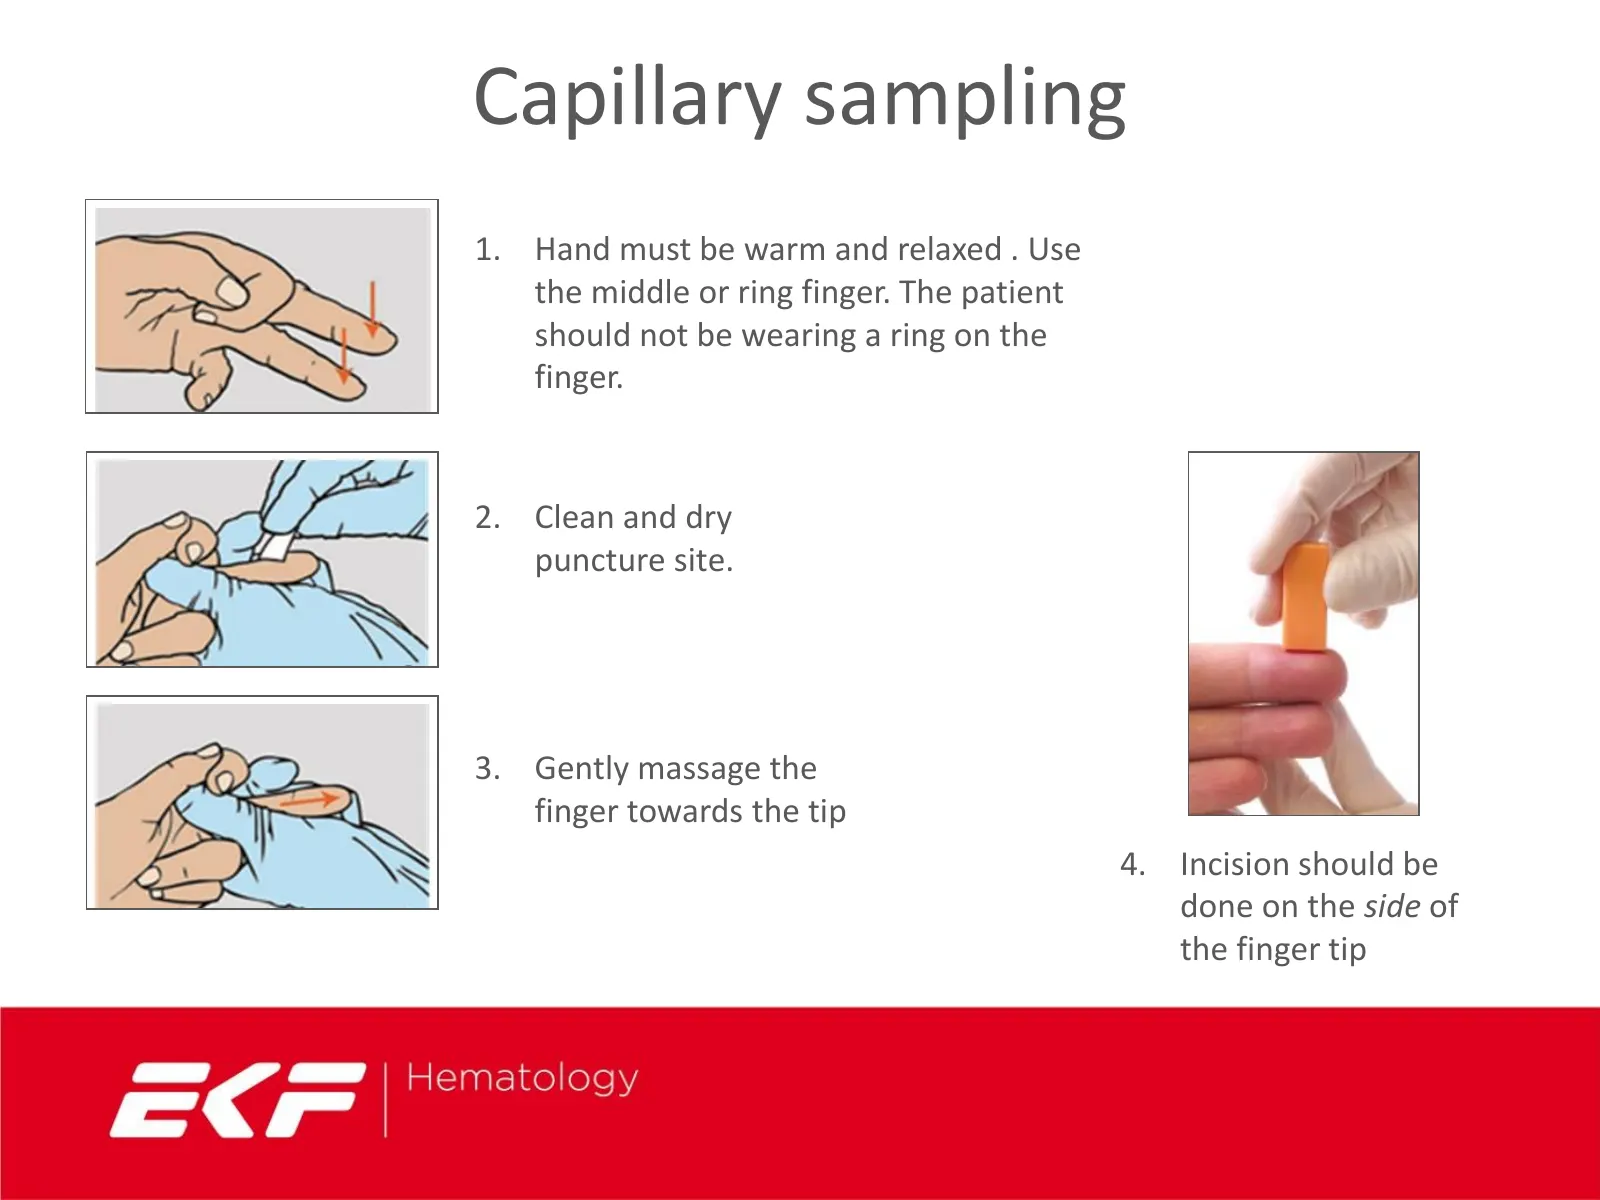
Capillary sampling 1. Hand must be warm and relaxed . Use the middle or ring finger. The patient should not be wearing a ring on the finger. 2. Clean and dry puncture site. 3. Gently massage the finger towards the tip 4. Incision should be done on the side of the finger tip
Slide 15: Capillary sampling
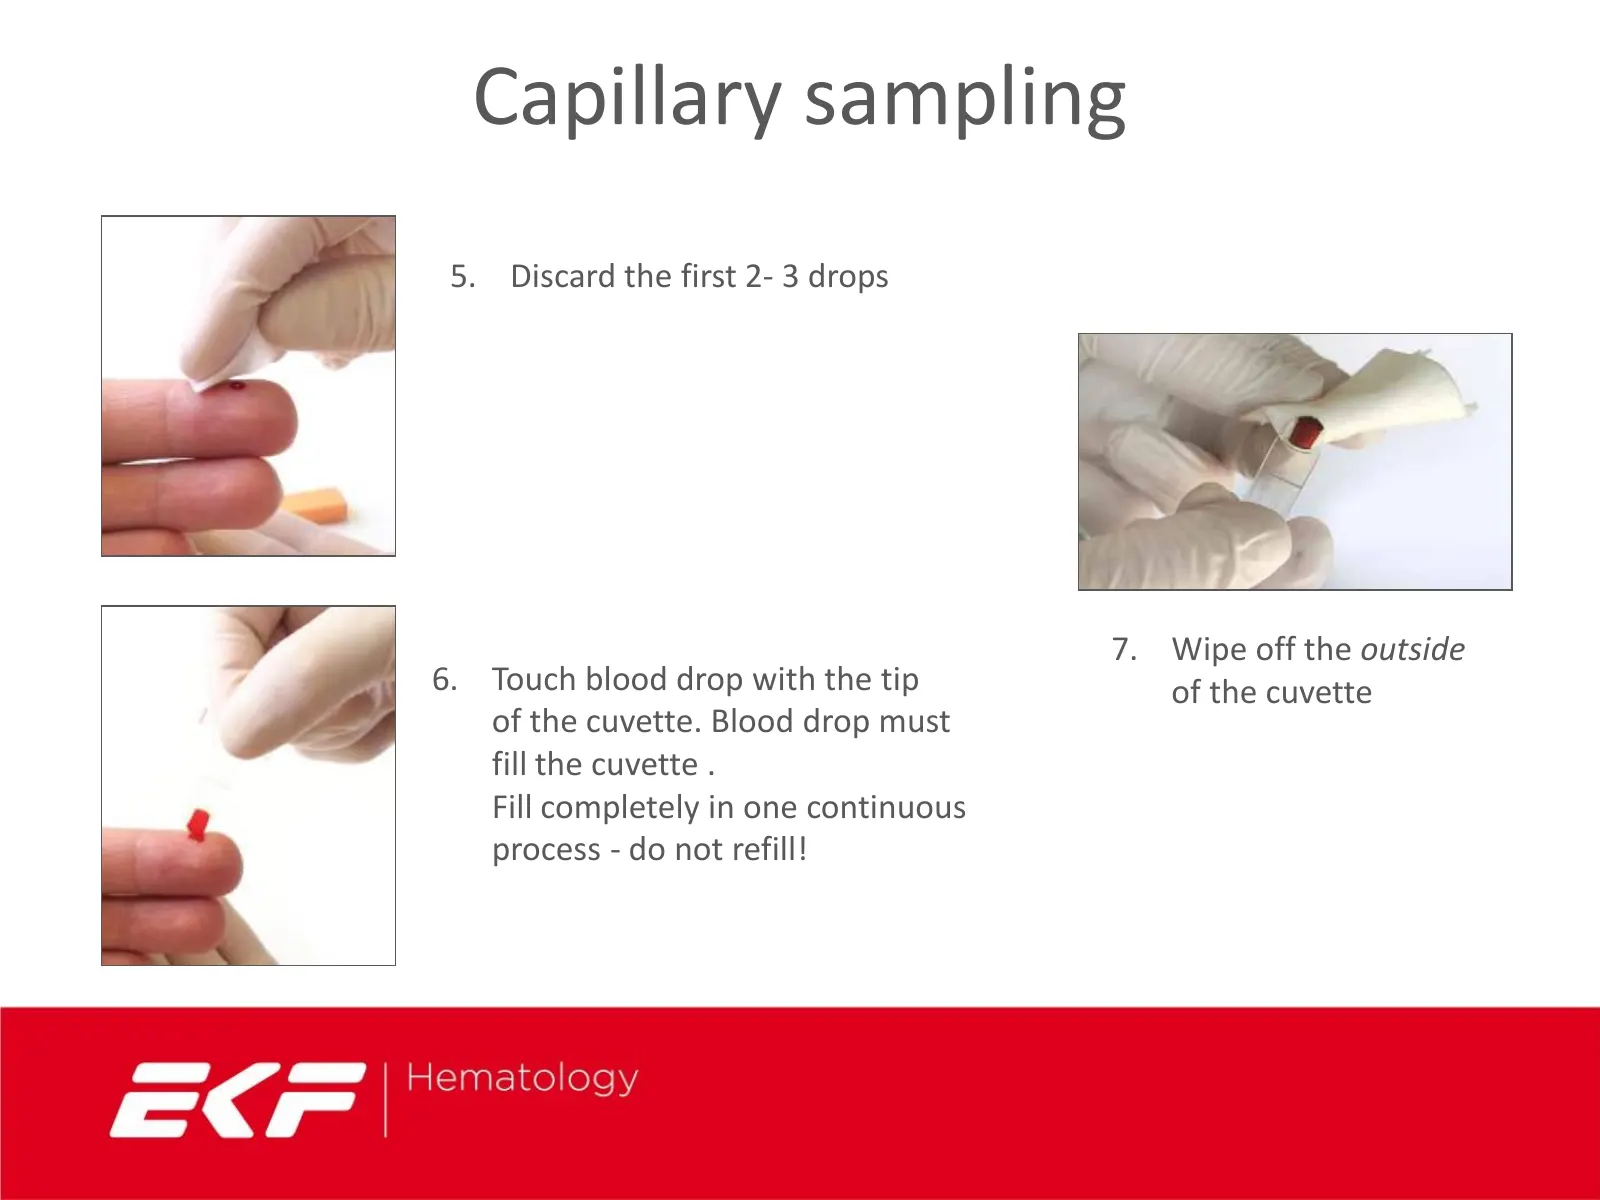
Capillary sampling 5. Discard the first 2- 3 drops 7. Wipe off the outside 6. Touch blood drop with the tip of the cuvette of the cuvette. Blood drop must fill the cuvette . Fill completely in one continuous process - do not refill!
Slide 16: Incision
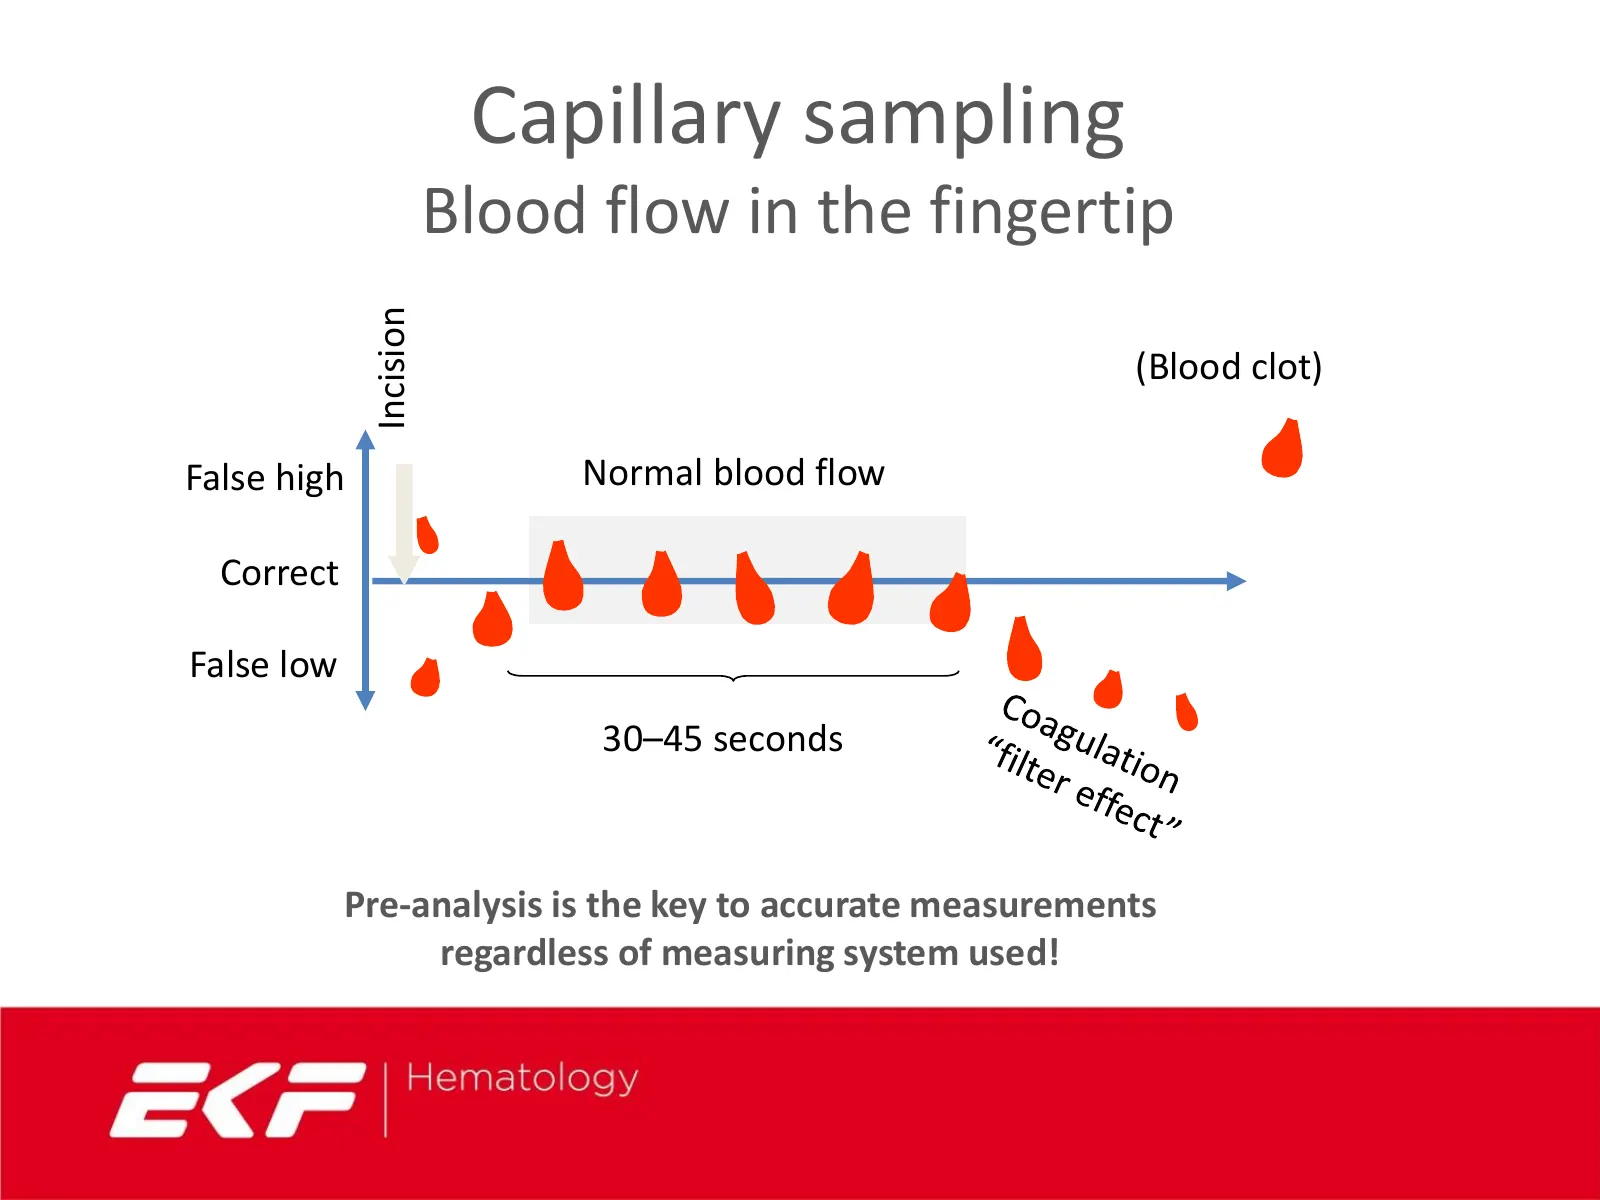
Capillary sampling Blood flow in the fingertip Incision (Blood clot) False high Normal blood flow Correct False low 30–45 seconds Pre-analysis is the key to accurate measurements regardless of measuring system used!
Slide 17: Method
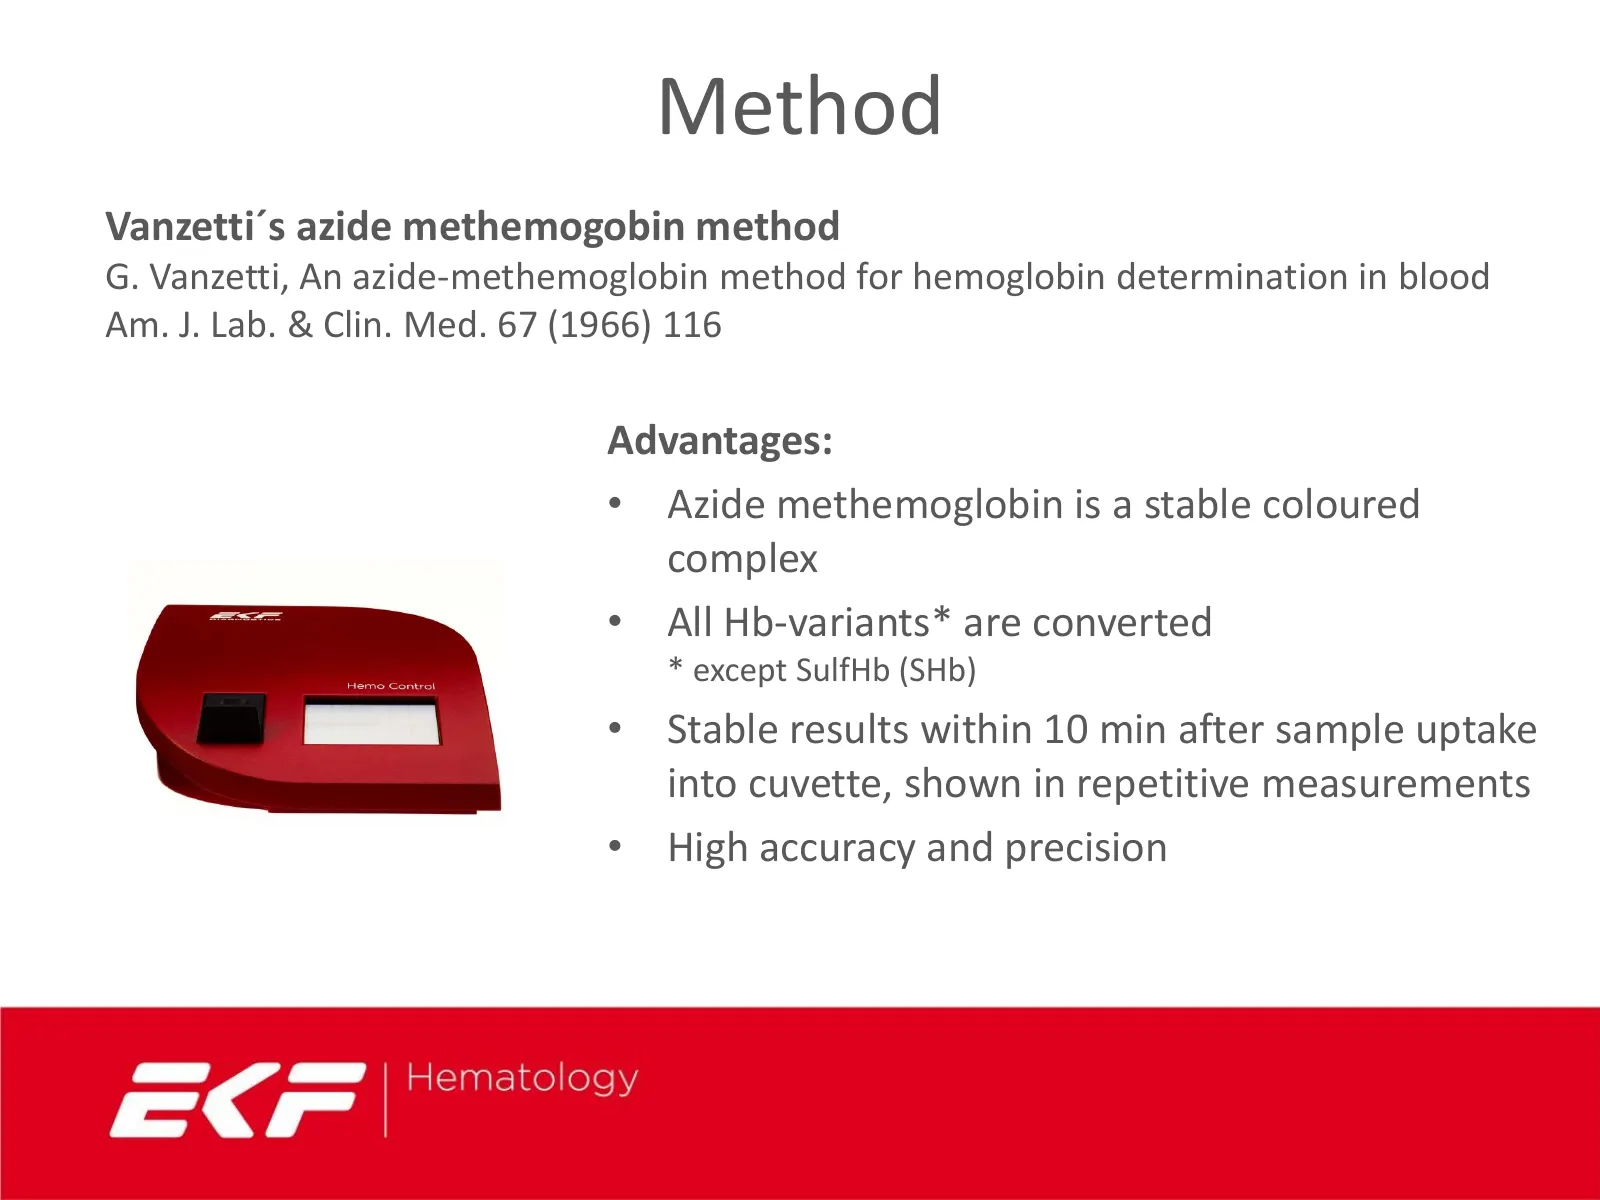
Method Vanzetti´s azide methemogobin method G. Vanzetti, An azide-methemoglobin method for hemoglobin determination in blood Am. J. Lab. & Clin. Med. 67 (1966) 116 Advantages: • Azide methemoglobin is a stable coloured complex • All Hb-variants* are converted * except SulfHb (SHb) • Stable results w
Slide 18: Method
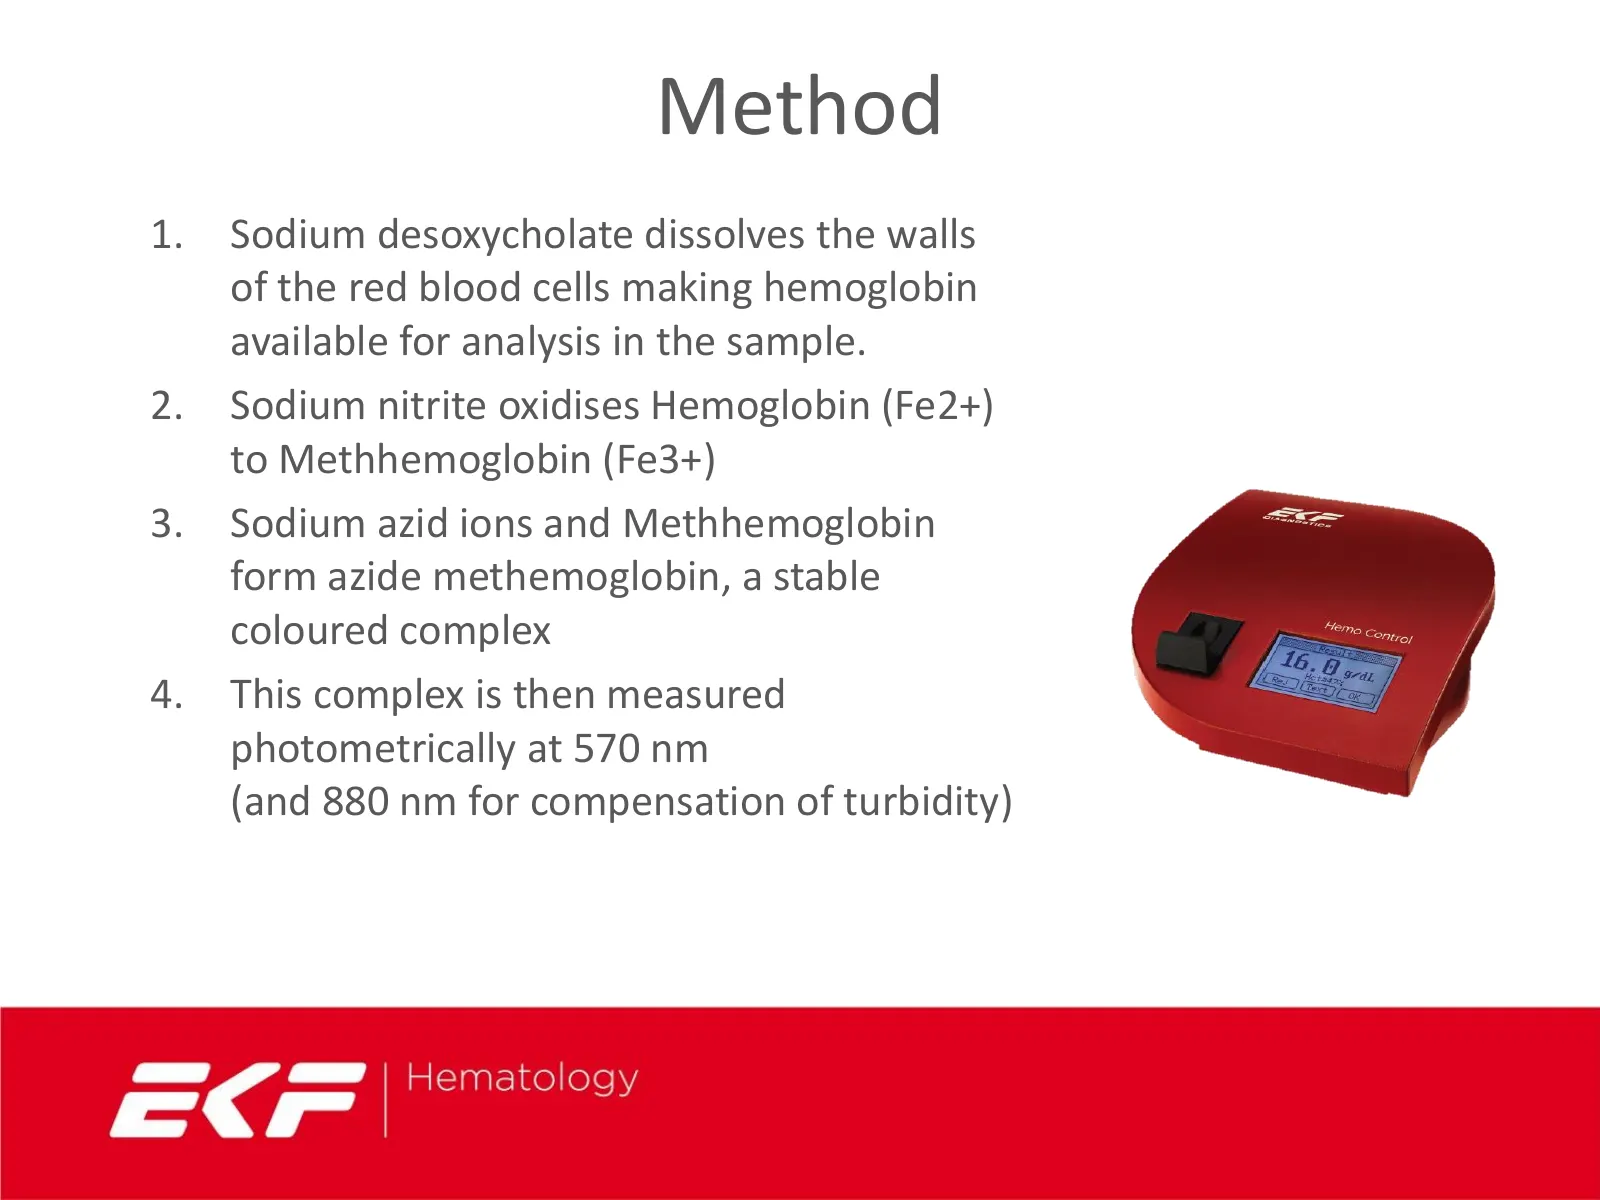
Method 1. Sodium desoxycholate dissolves the walls of the red blood cells making hemoglobin available for analysis in the sample. 2. Sodium nitrite oxidises Hemoglobin (Fe2+) to Methhemoglobin (Fe3+) 3. Sodium azid ions and Methhemoglobin form azide methemoglobin, a stable coloured complex 4. This c
Slide 19: Calibration
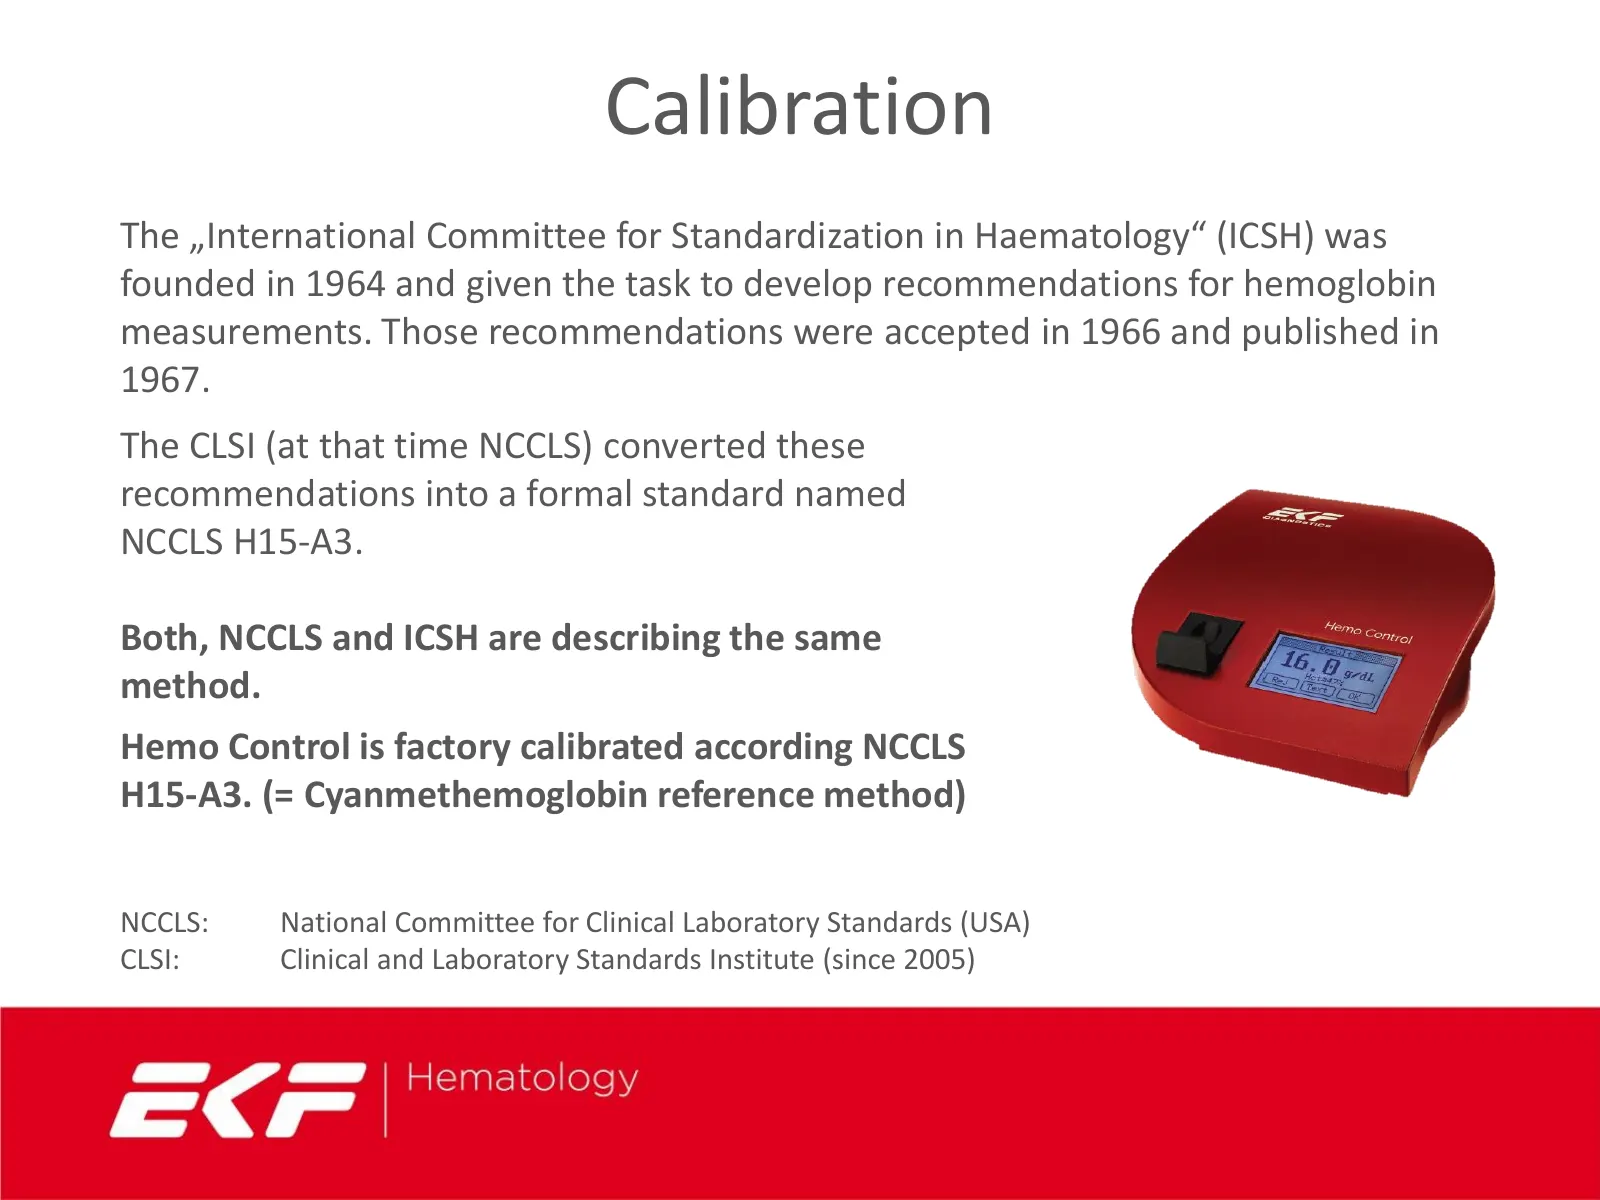
Calibration The „International Committee for Standardization in Haematology“ (ICSH) was founded in 1964 and given the task to develop recommendations for hemoglobin measurements. Those recommendations were accepted in 1966 and published in 1967. The CLSI (at that time NCCLS) converted these recommen
Slide 20: Analytical performance
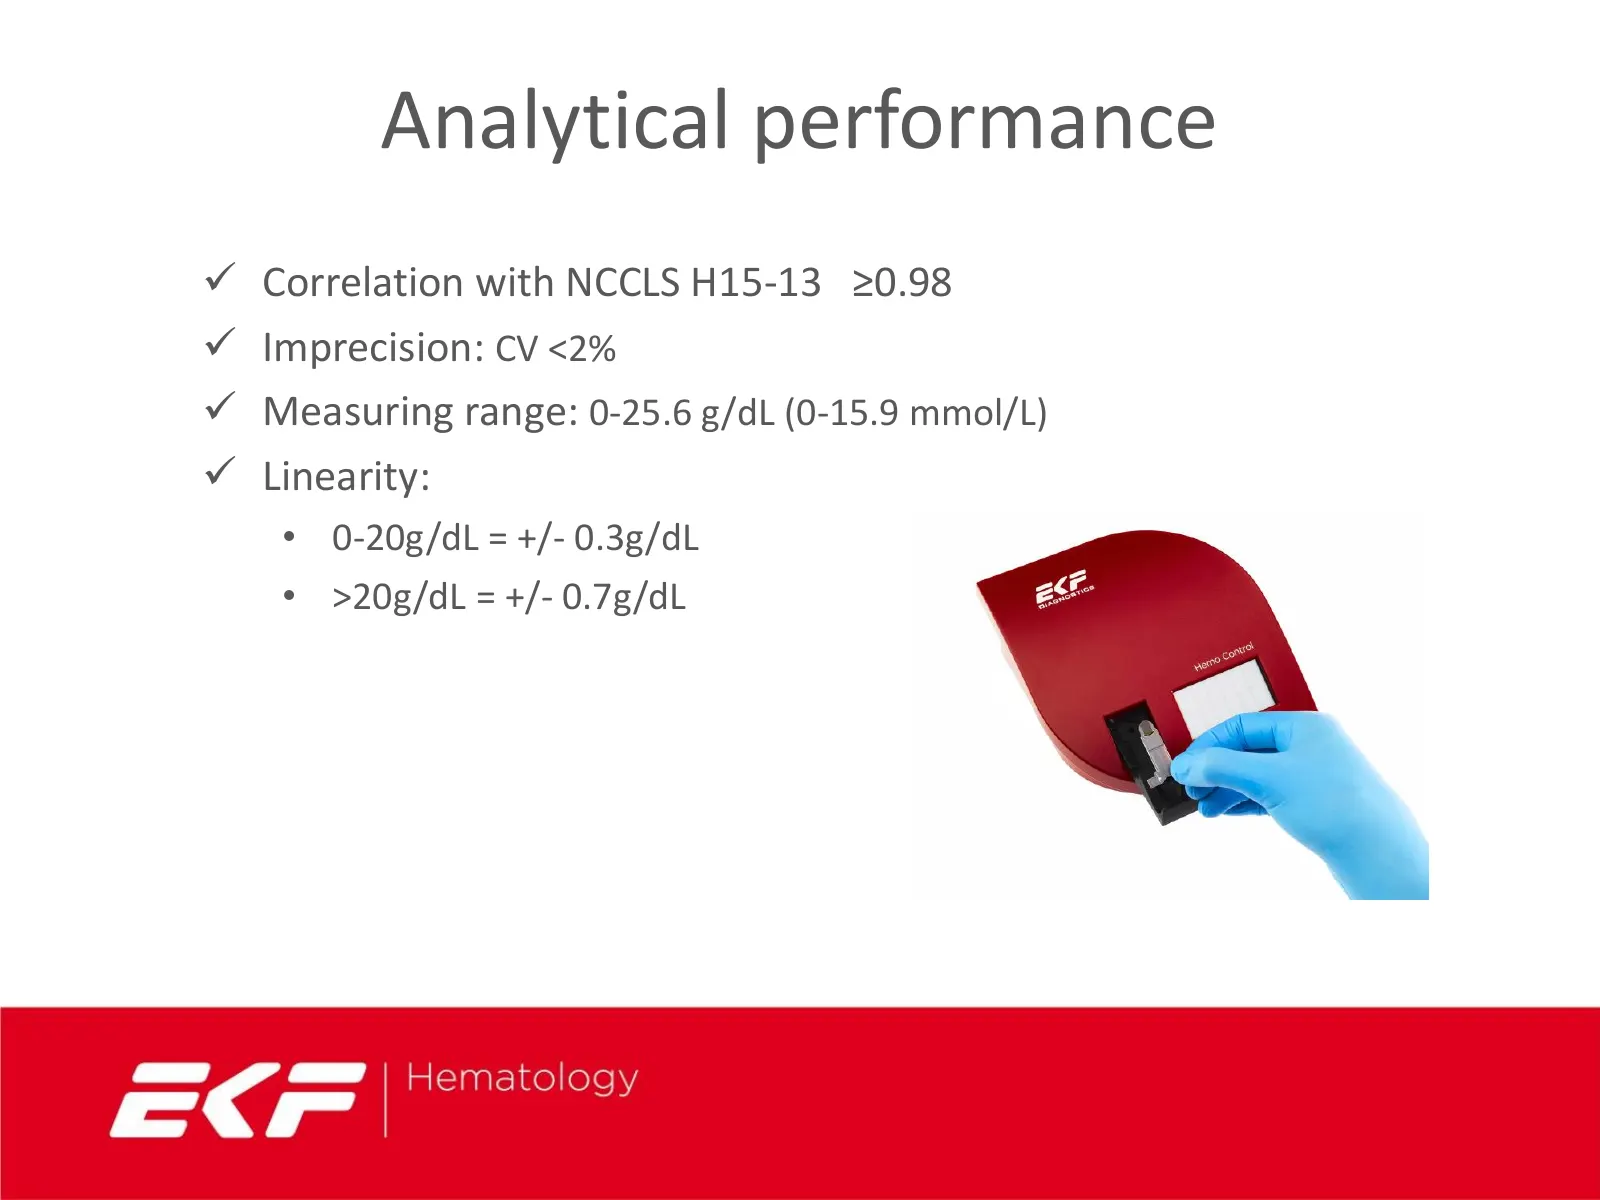
Analytical performance Correlation with NCCLS H15-13 ≥0.98 Imprecision: CV <2% Measuring range: 0-25.6 g/dL (0-15.9 mmol/L) Linearity: • 0-20g/dL = +/- 0.3g/dL • >20g/dL = +/- 0.7g/dL
Slide 21: Hematocrit
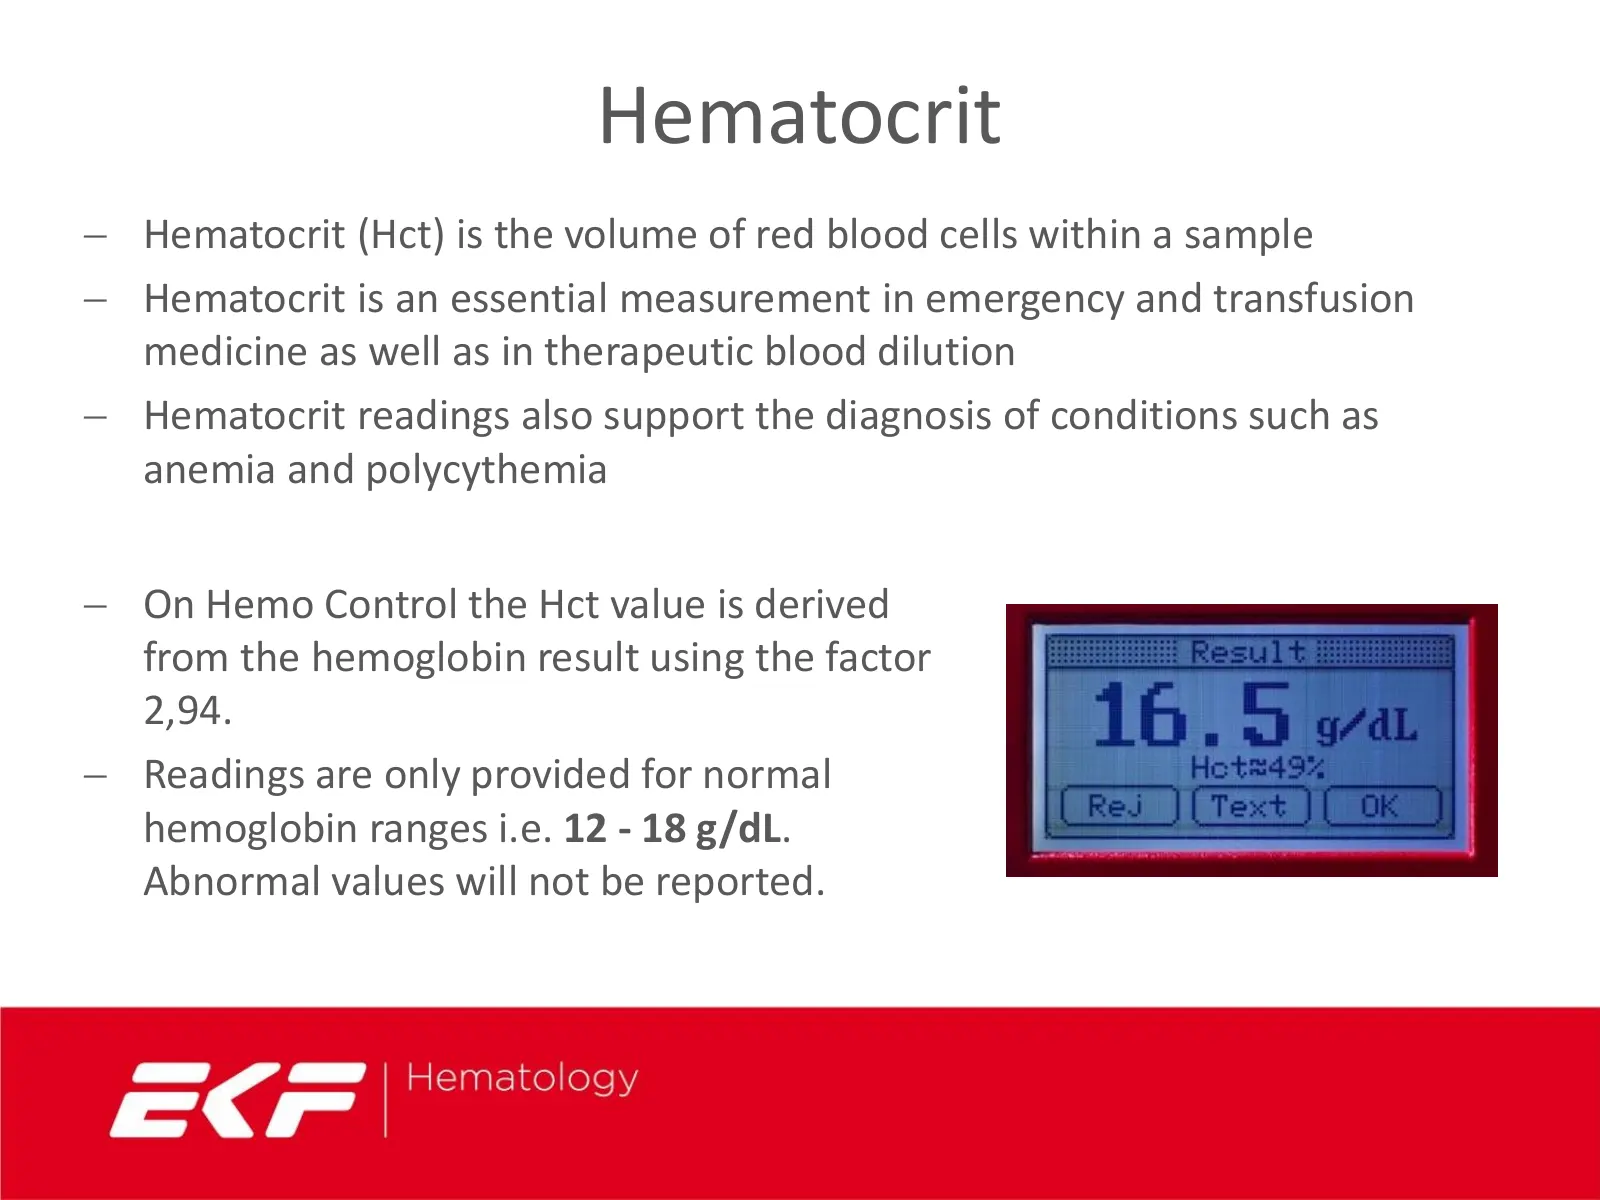
Hematocrit Hematocrit (Hct) is the volume of red blood cells within a sample Hematocrit is an essential measurement in emergency and transfusion medicine as well as in therapeutic blood dilution Hematocrit readings also support the diagnosis of conditions such as anemia and polycythemia On H
Slide 22: Control materials
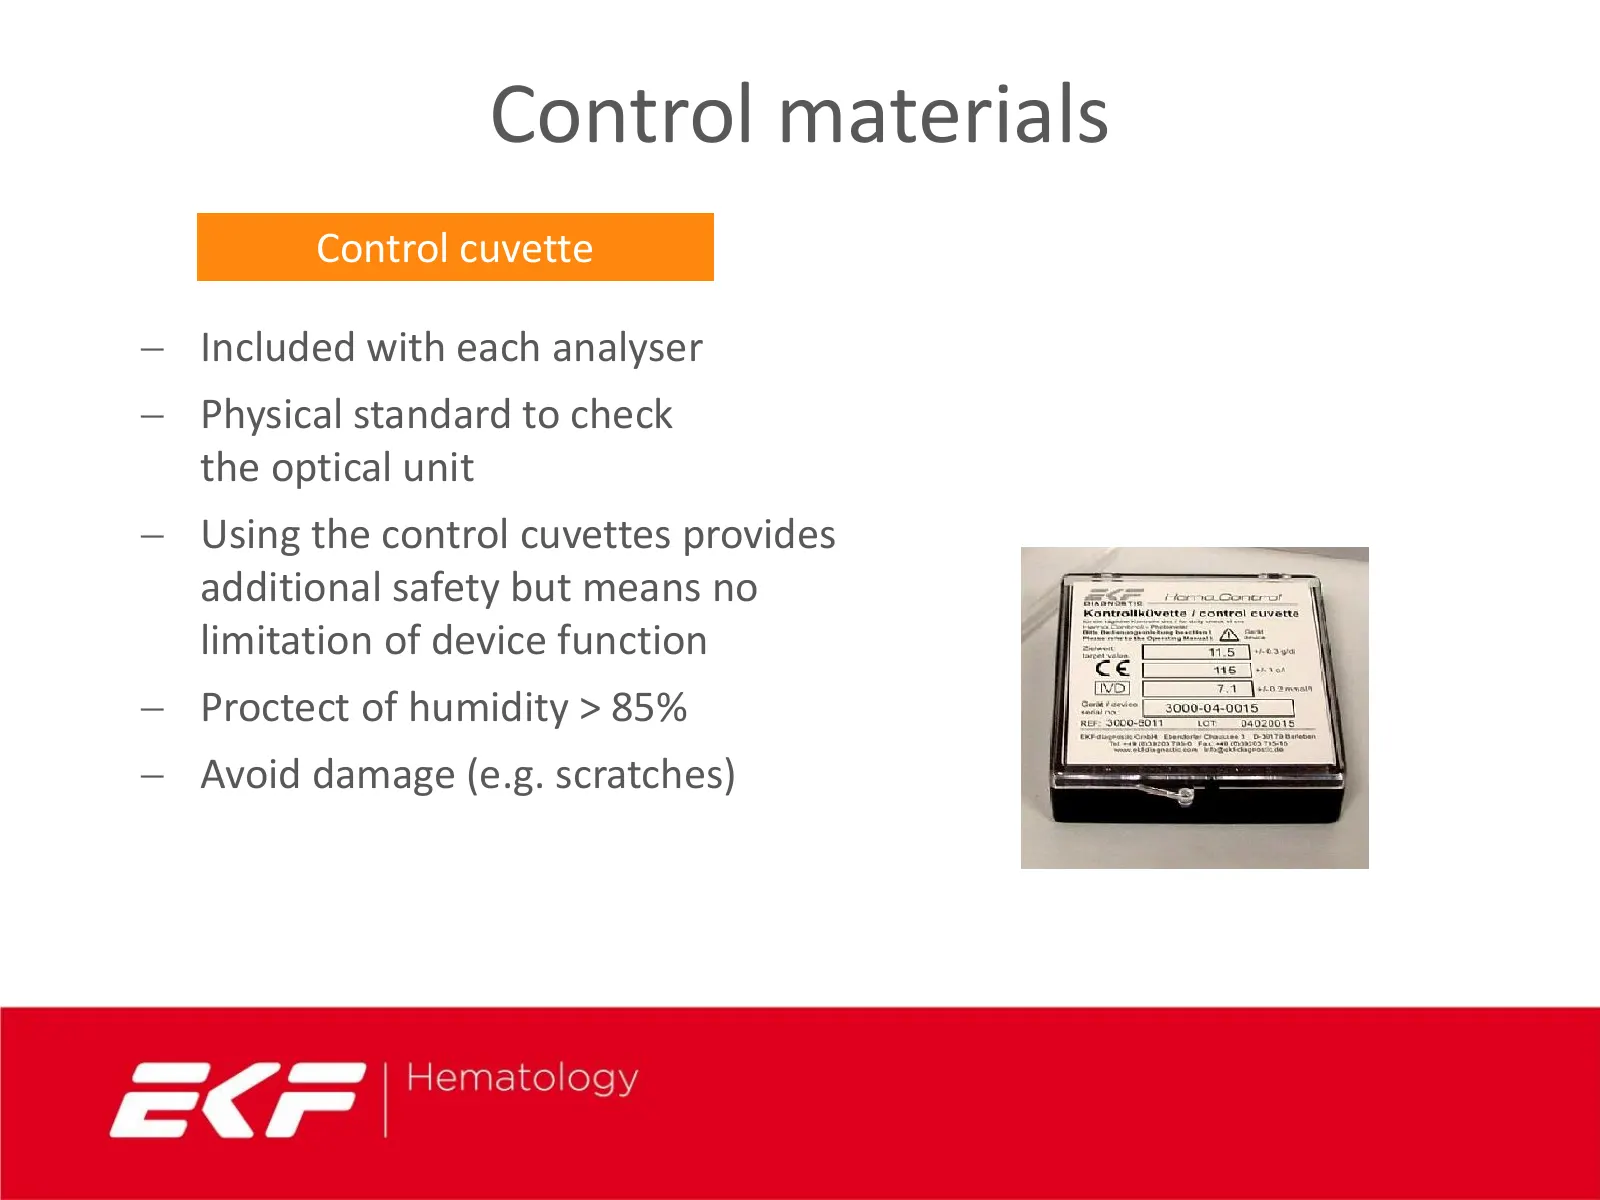
Control materials Control cuvette Included with each analyser Physical standard to check the optical unit Using the control cuvettes provides additional safety but means no limitation of device function Proctect of humidity > 85% Avoid damage (e.g. scratches)
Slide 23: Control materials
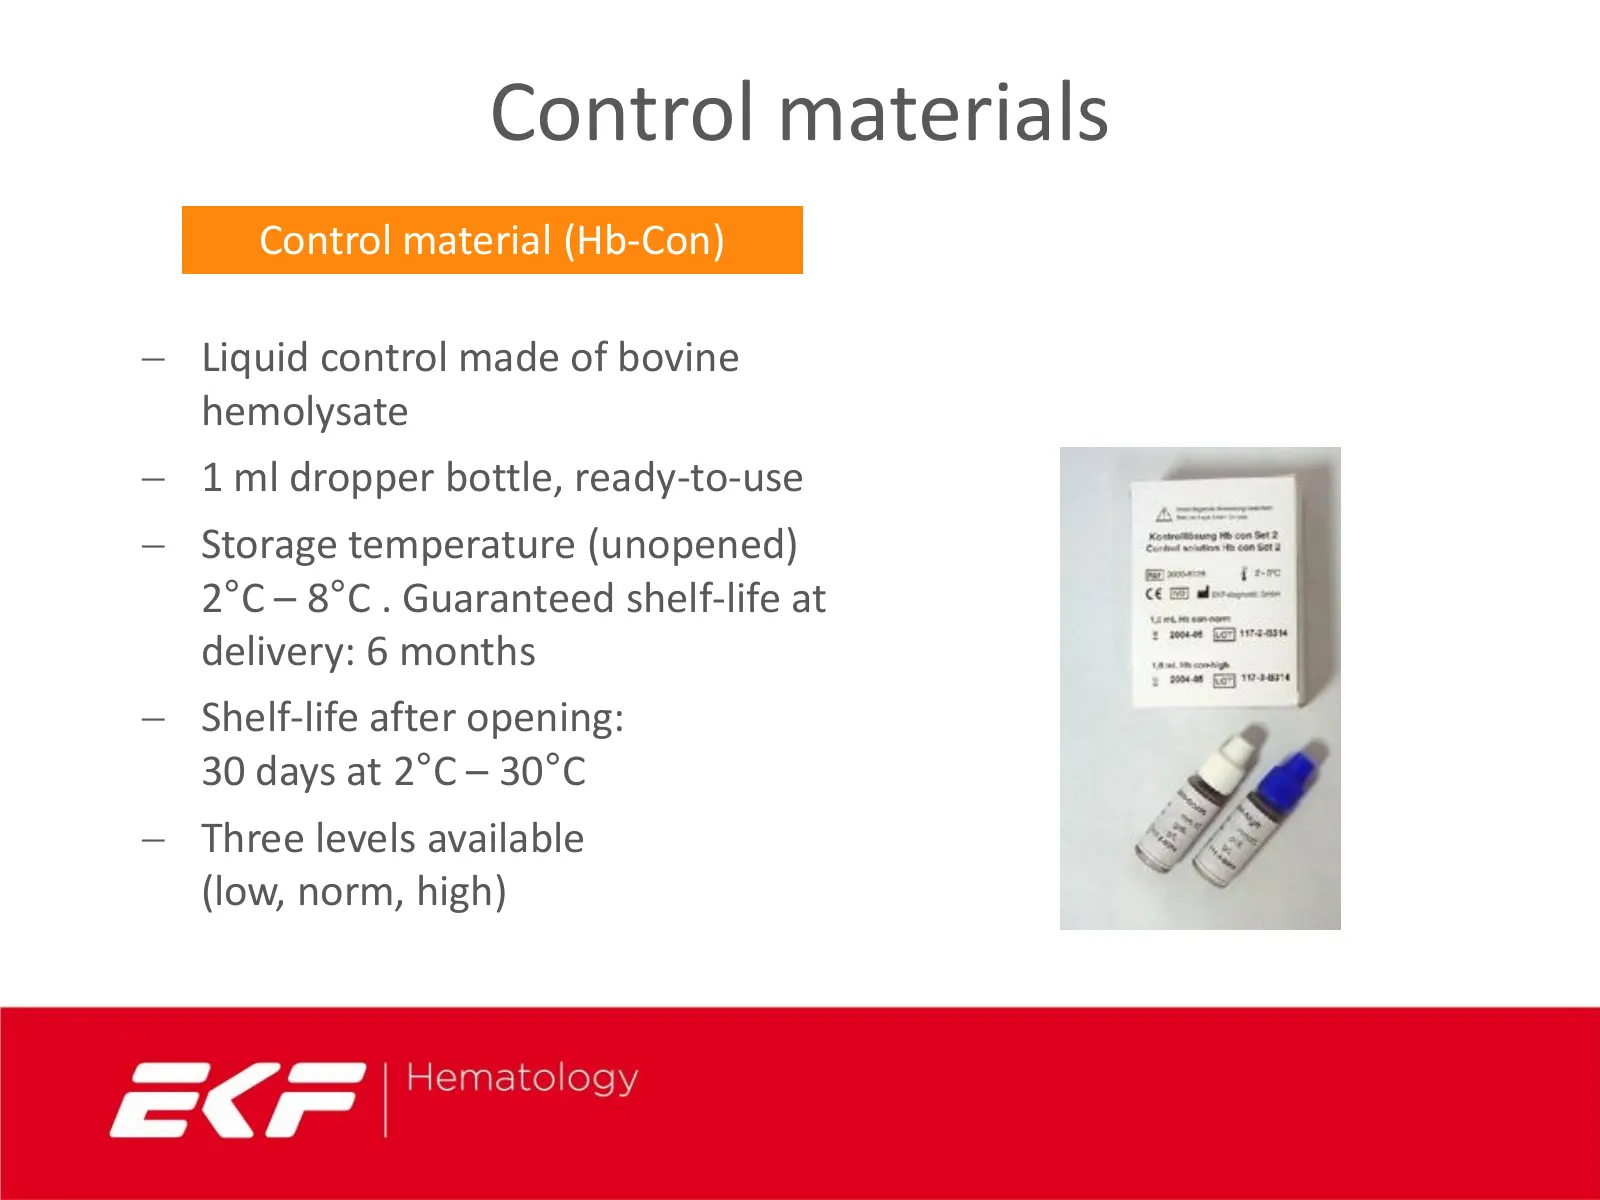
Control materials Control material (Hb-Con) Liquid control made of bovine hemolysate 1 ml dropper bottle, ready-to-use Storage temperature (unopened) 2°C – 8°C . Guaranteed shelf-life at delivery: 6 months Shelf-life after opening: 30 days at 2°C – 30°C Three levels available (low, norm, h
Slide 24: Cleaning procedure
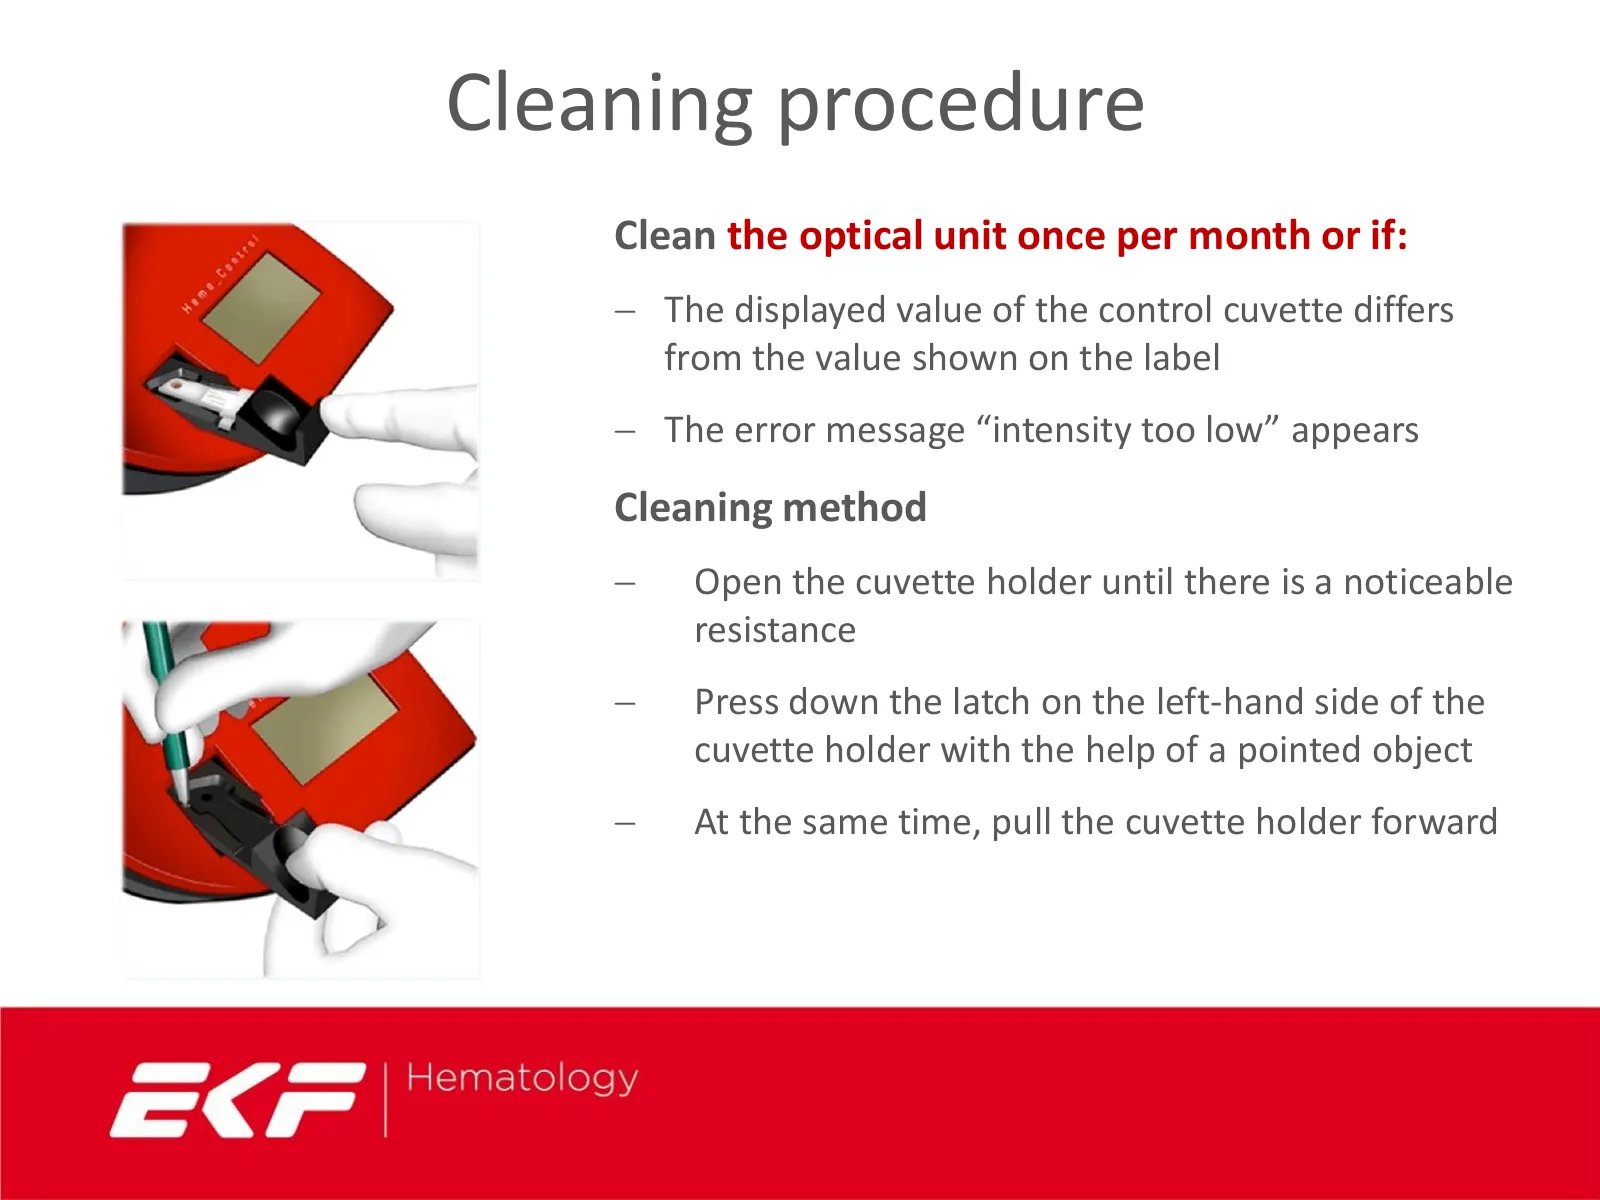
Cleaning procedure Clean the optical unit once per month or if: The displayed value of the control cuvette differs from the value shown on the label The error message “intensity too low” appears Cleaning method Open the cuvette holder until there is a noticeable resistance Press down the lat
Slide 25: Cleaning procedure
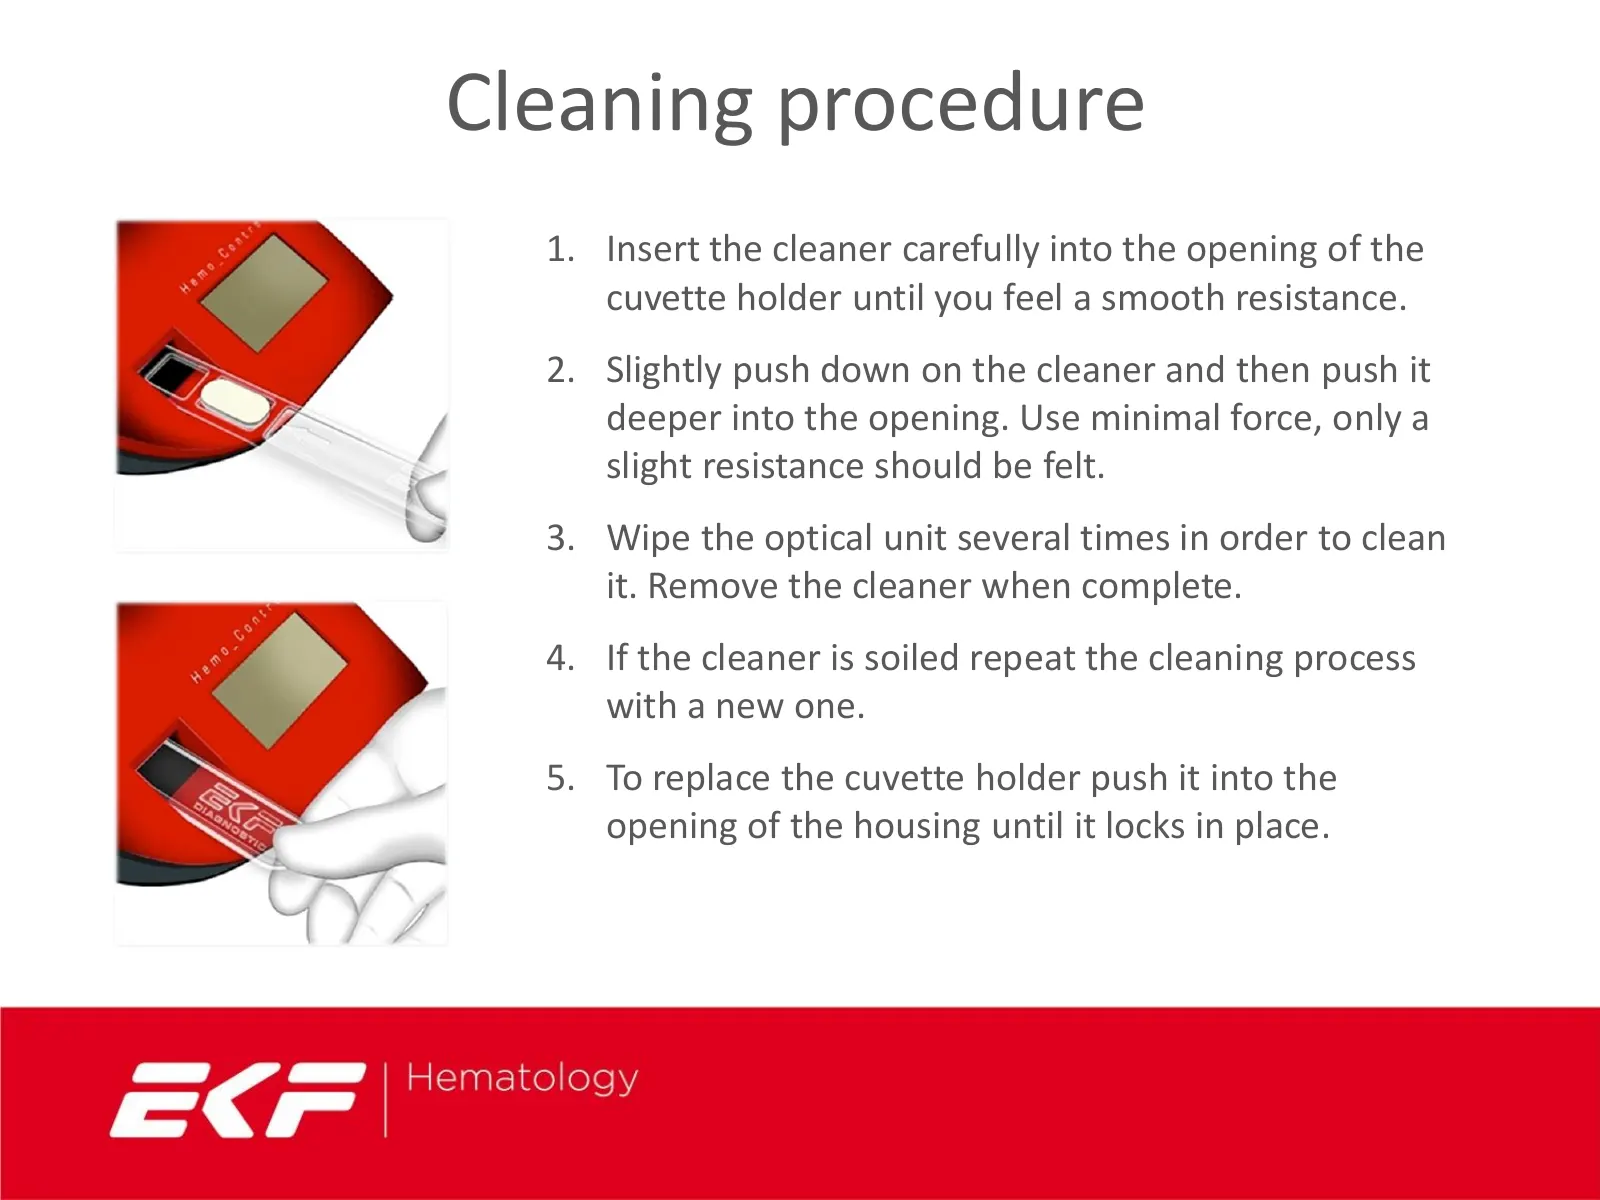
Cleaning procedure 1. Insert the cleaner carefully into the opening of the cuvette holder until you feel a smooth resistance. 2. Slightly push down on the cleaner and then push it deeper into the opening. Use minimal force, only a slight resistance should be felt. 3. Wipe the optical unit several ti
Slide 26: Cleaning procedure
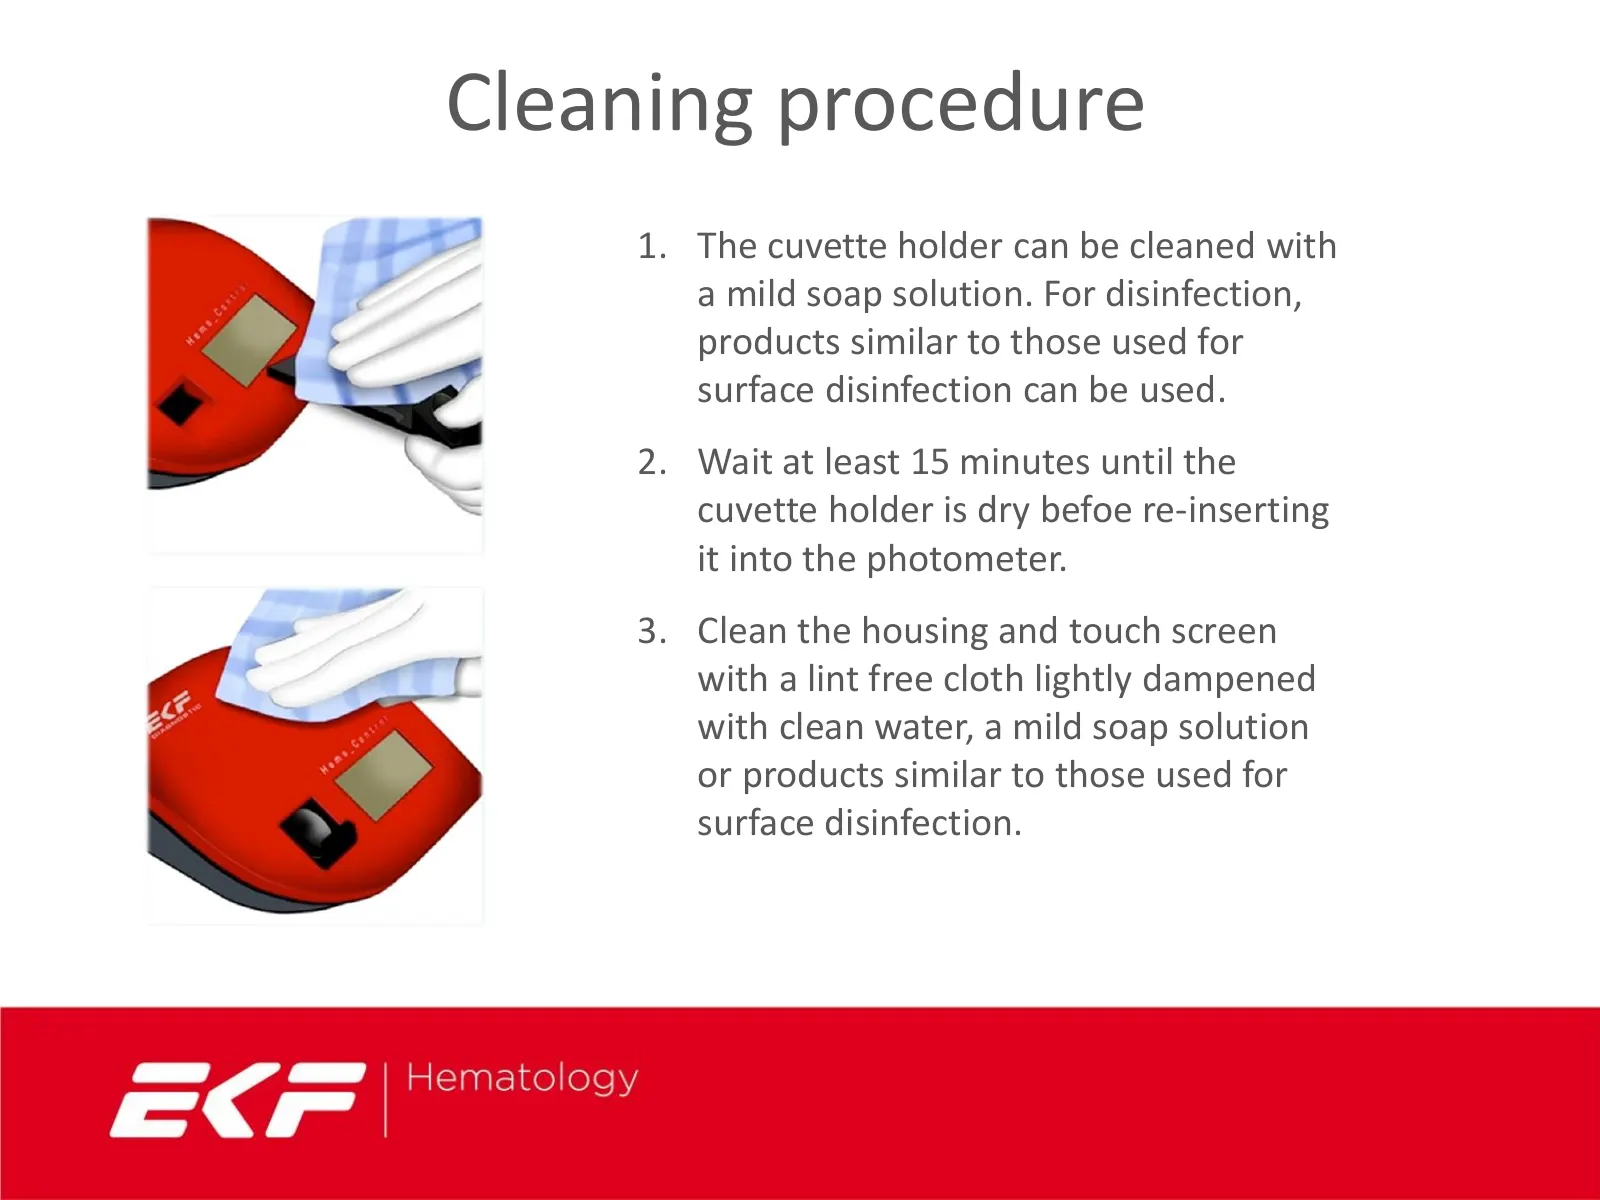
Cleaning procedure 1. The cuvette holder can be cleaned with a mild soap solution. For disinfection, products similar to those used for surface disinfection can be used. 2. Wait at least 15 minutes until the cuvette holder is dry befoe re-inserting it into the photometer. 3. Clean the housing and to
Slide 27: Evaluations
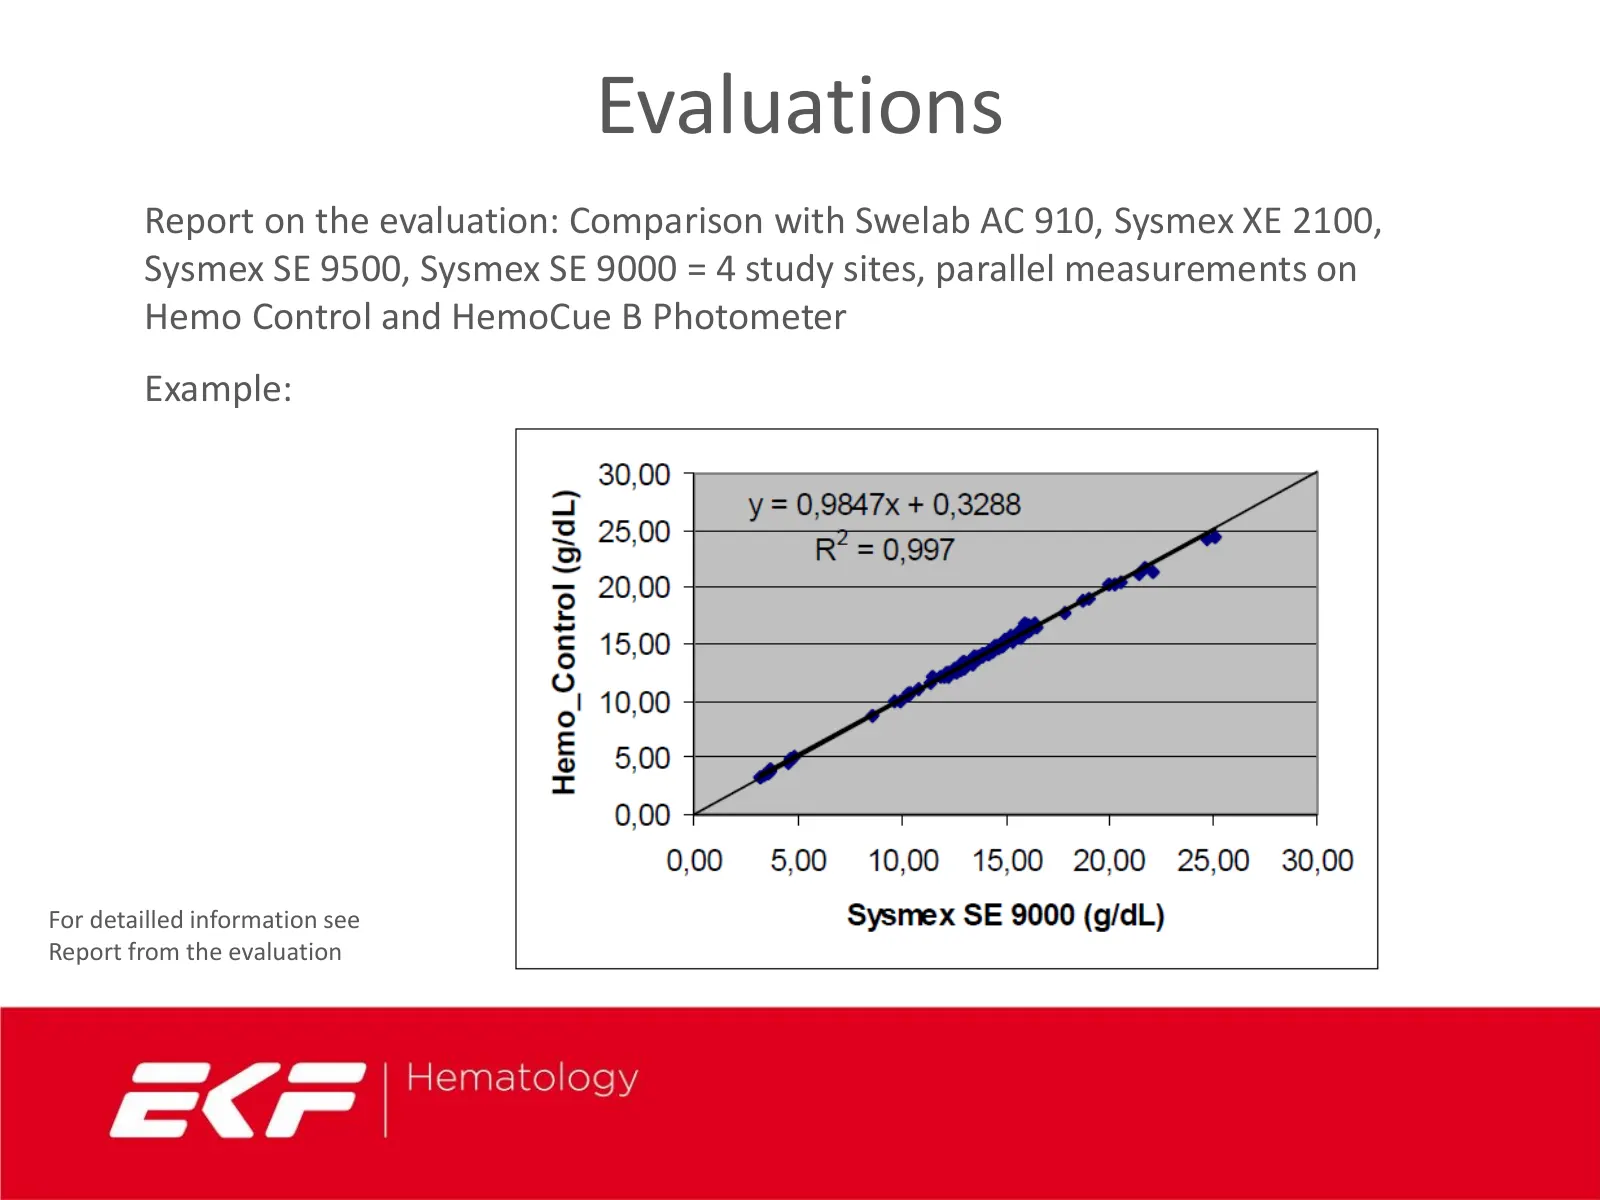
Evaluations Report on the evaluation: Comparison with Swelab AC 910, Sysmex XE 2100, Sysmex SE 9500, Sysmex SE 9000 = 4 study sites, parallel measurements on Hemo Control and HemoCue B Photometer Example: For detailled information see Report from the evaluation
Slide 28: 2004 SKUP Report (Scandinavia)
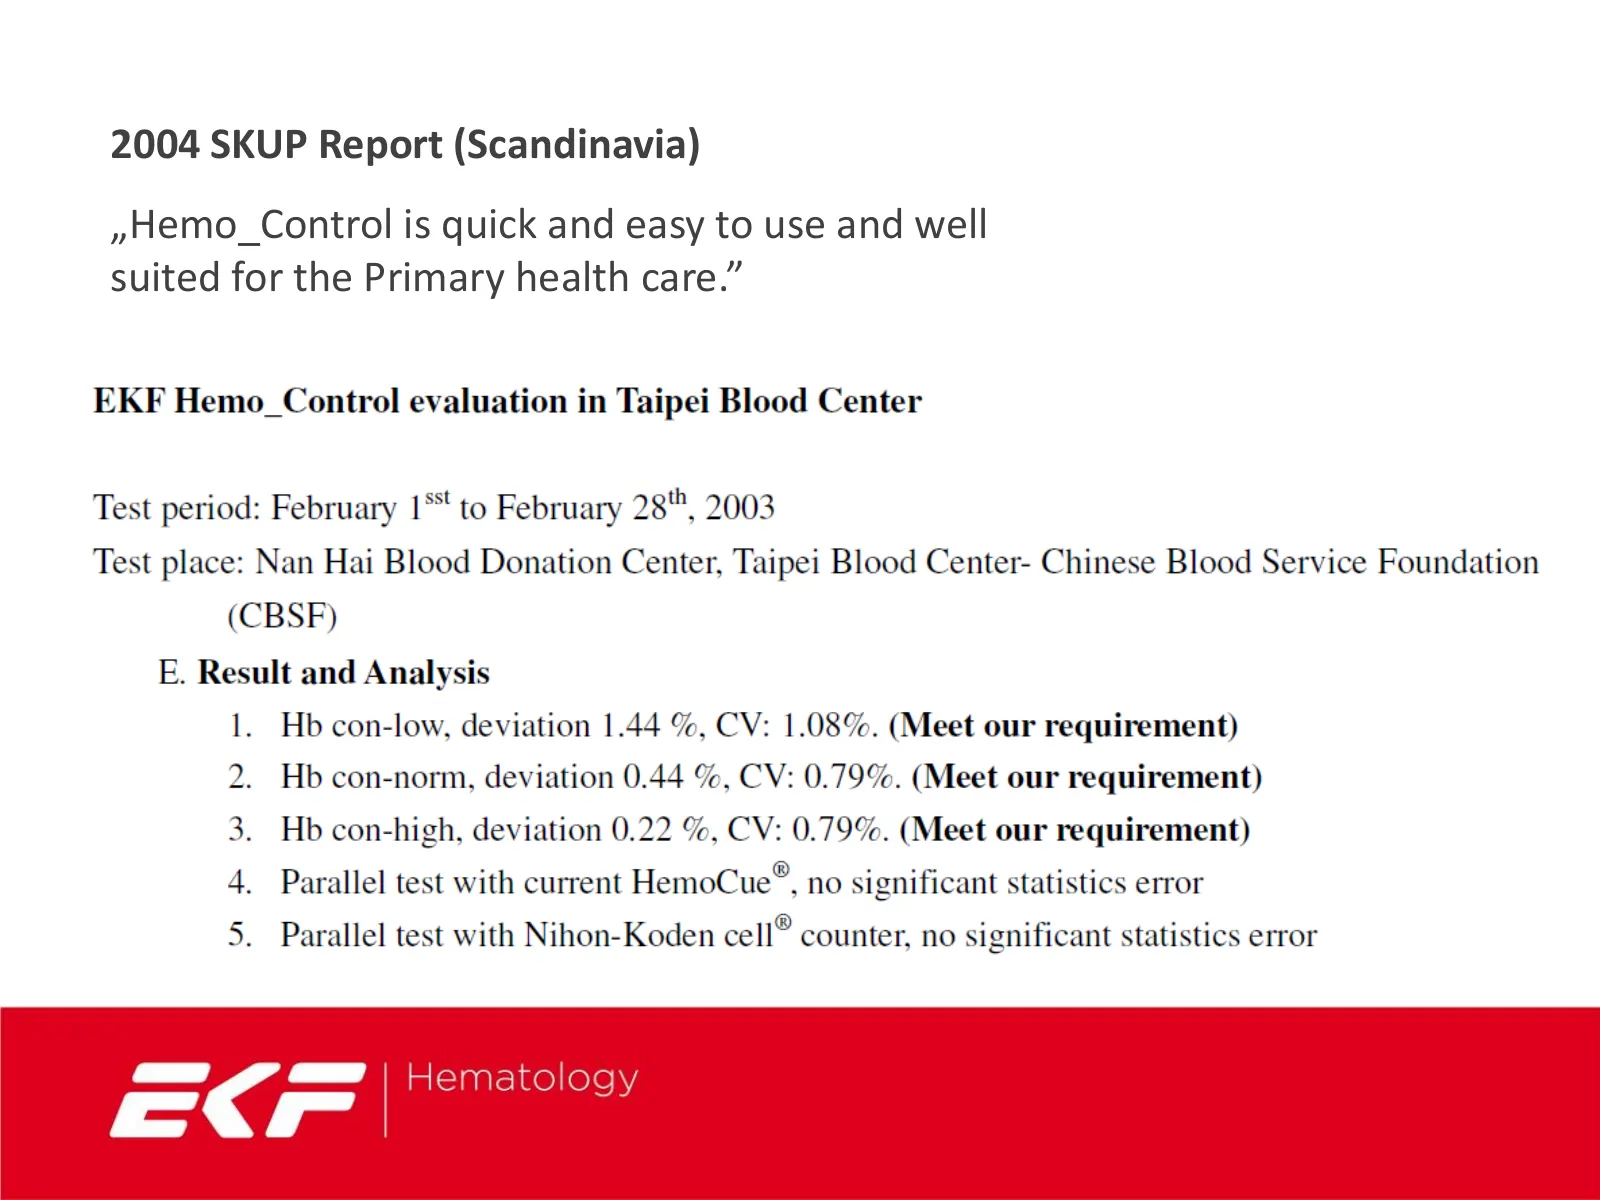
2004 SKUP Report (Scandinavia) „Hemo_Control is quick and easy to use and well suited for the Primary health care.”
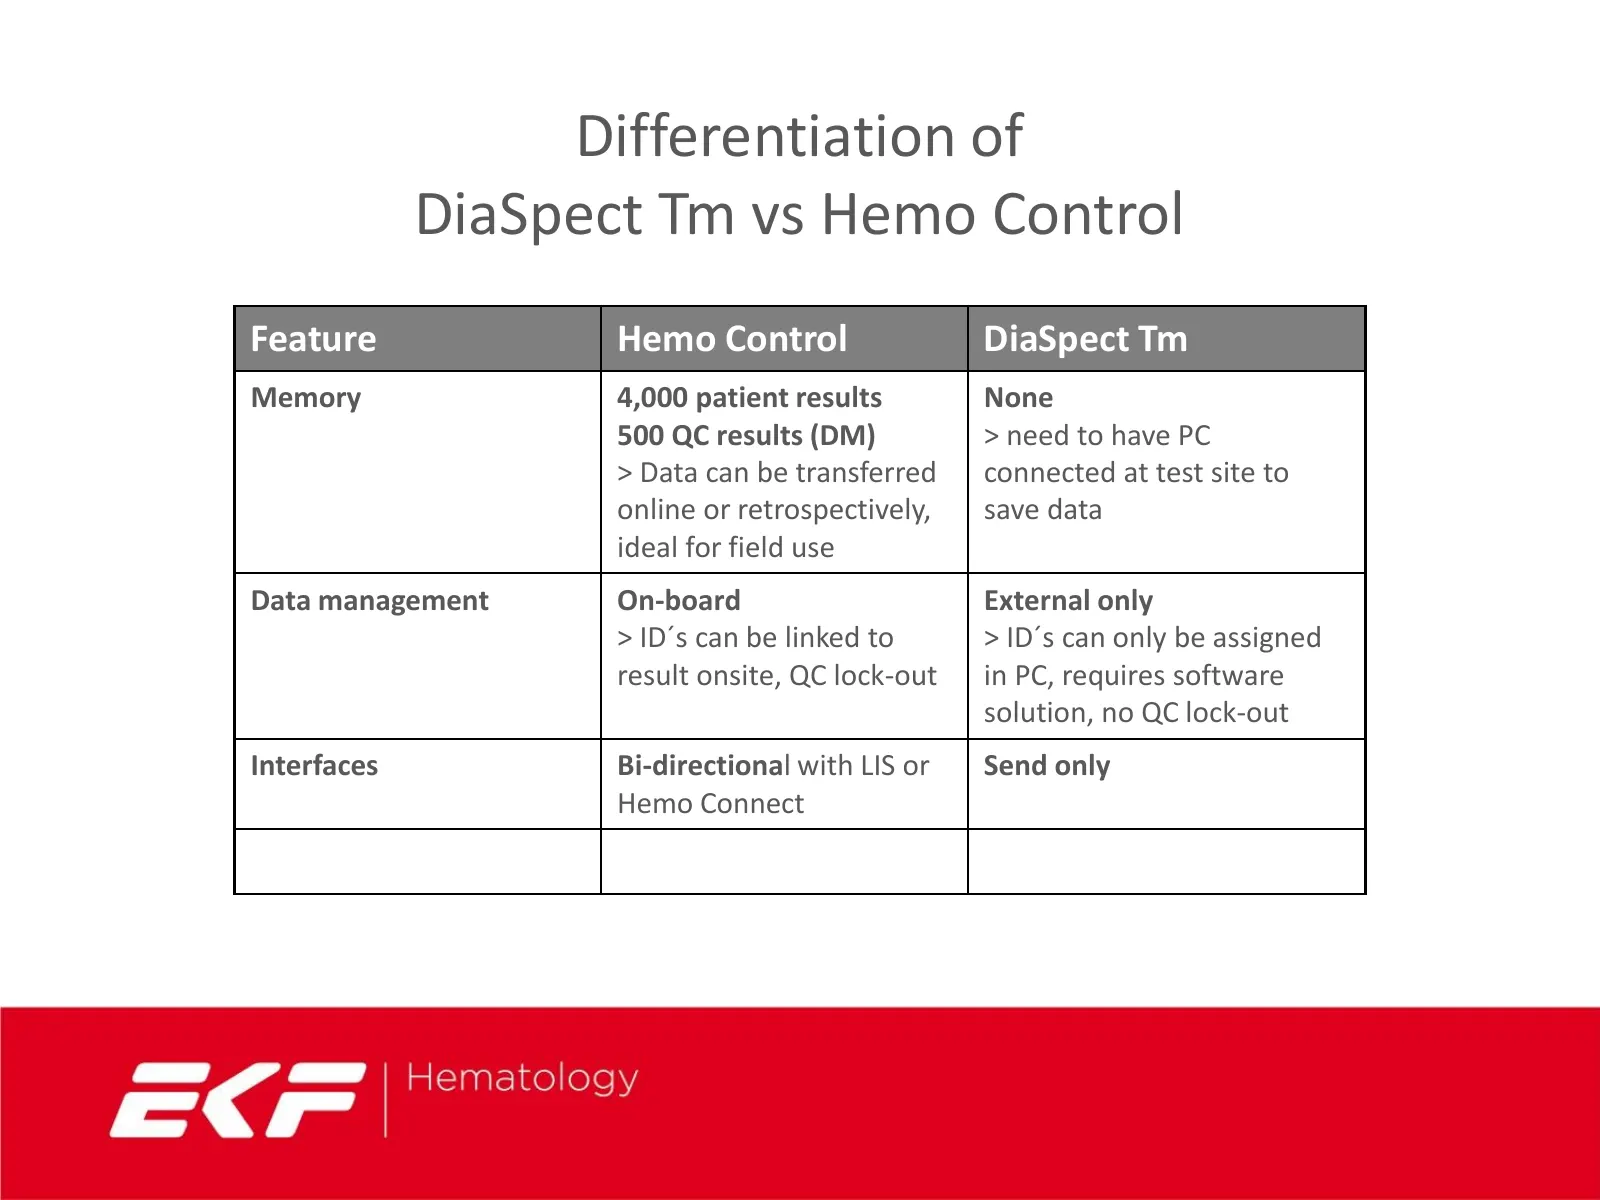
Slide 29: Differentiation of DiaSpect Tm vs Hemo Control
Differentiation of DiaSpect Tm vs Hemo Control Feature Hemo Control DiaSpect Tm Memory 4,000 patient results None 500 QC results (DM) > need to have PC > Data can be transferred connected at test site to online or retrospectively, save data ideal for field use Data management On-board External only
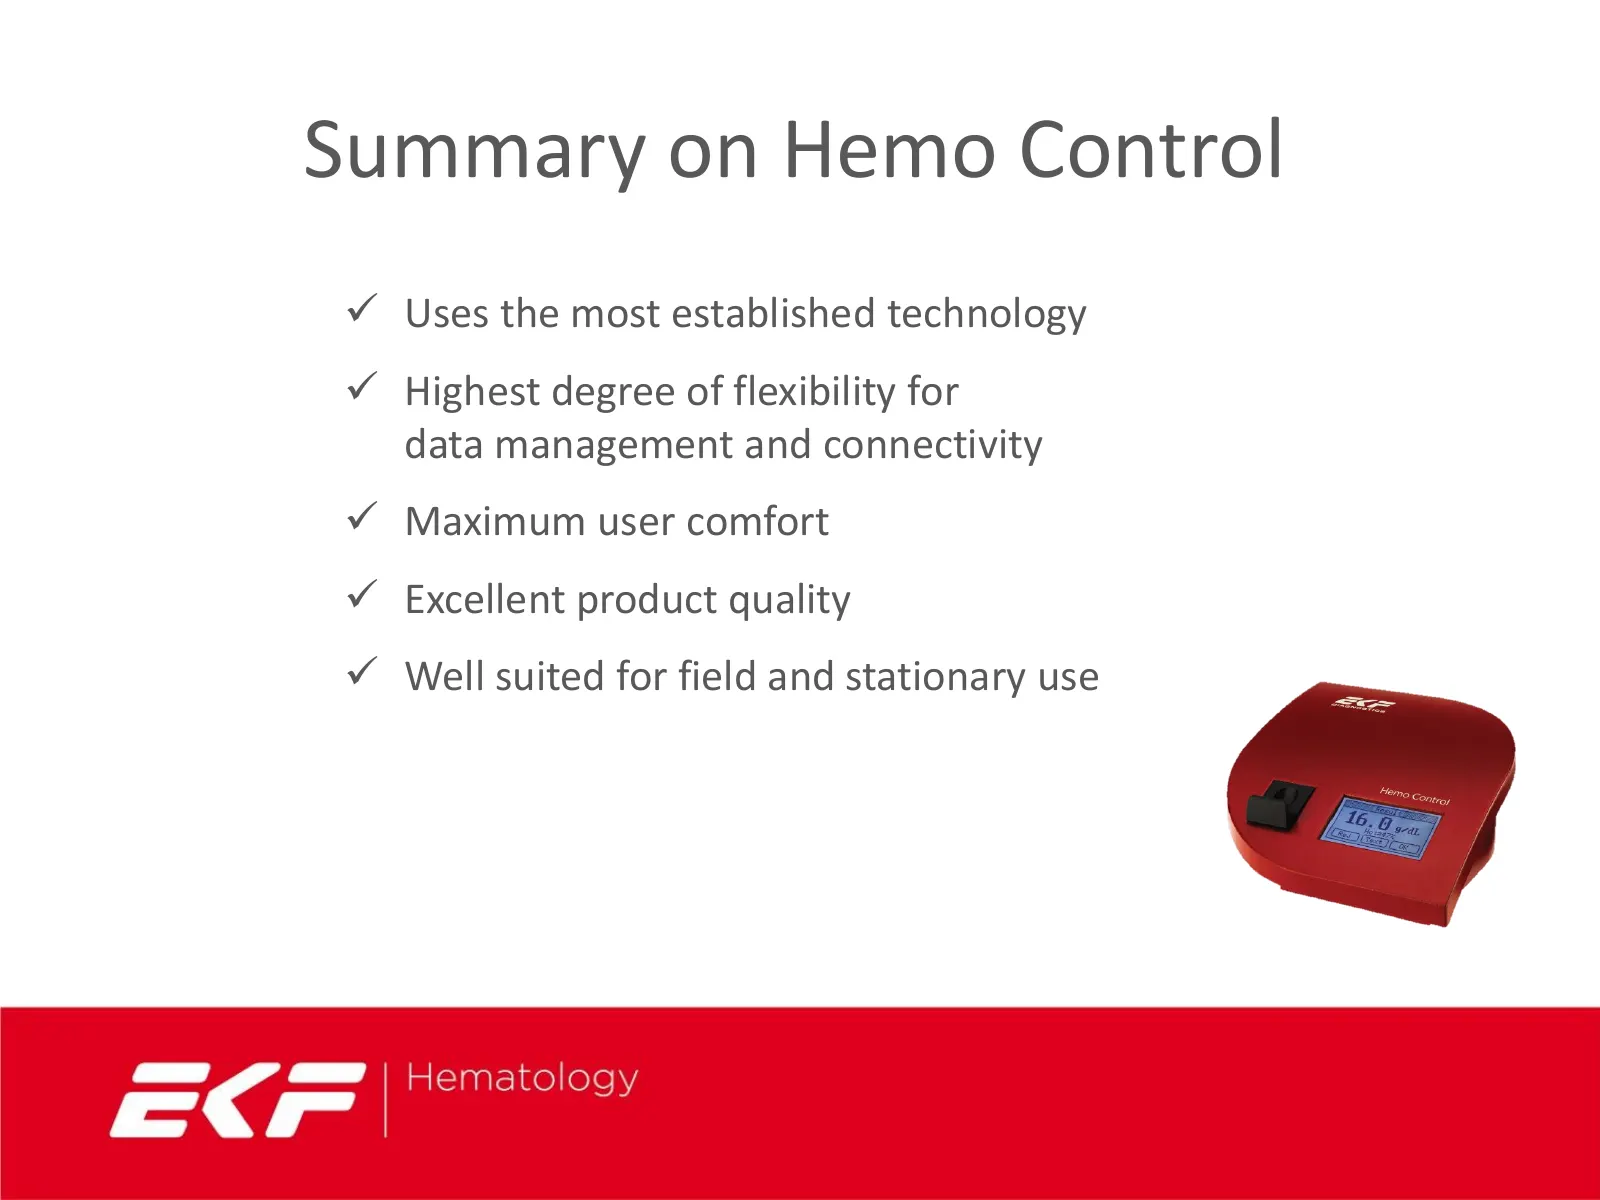
Slide 30: Summary on Hemo Control
Summary on Hemo Control Uses the most established technology Highest degree of flexibility for data management and connectivity Maximum user comfort Excellent product quality Well suited for field and stationary use

Slide 31: Thank you
Thank you =r | Hematology
Source: Internet Archive copy of ekfdiagnostics.com
More decks from EKF Diagnostics Holdings plc
 H1 2026 Earnings Presentation31 slides · Sep 15, 2026
 FY2025 Earnings Presentation37 slides · March 2026
 Q2 2025 Earnings Presentation20 slides · Sep 16, 2025
 FY2024 Earnings Presentation25 slides · Mar 25, 2025
 H1 2024 Earnings Presentation28 slides · September 2024
 FY2023 Earnings Presentation33 slides · 2024